 Skip to content
 World of Tanks has never been shy about dangling shiny carrots in front of its most dedicated players, but the Black Rock Heavy reward tank raises the stakes higher than ever. Slotted as the “prestige” prize of Personal Missions 3.0, this Tier XI American heavy tank doesn’t come easy—and it doesn’t play like anything else in the game. Many players underestimate the grind or assume the tank is just another hull down brawler. Losing hundreds of hours of mission progress because of poor planning or unrealistic expectations. Understand exactly what this tank is, how to earn it, and how to exploit its unique Burst Mode mechanic to dominate late-game battles.
TL;DR — Black Rock Heavy Tank in a Nutshell
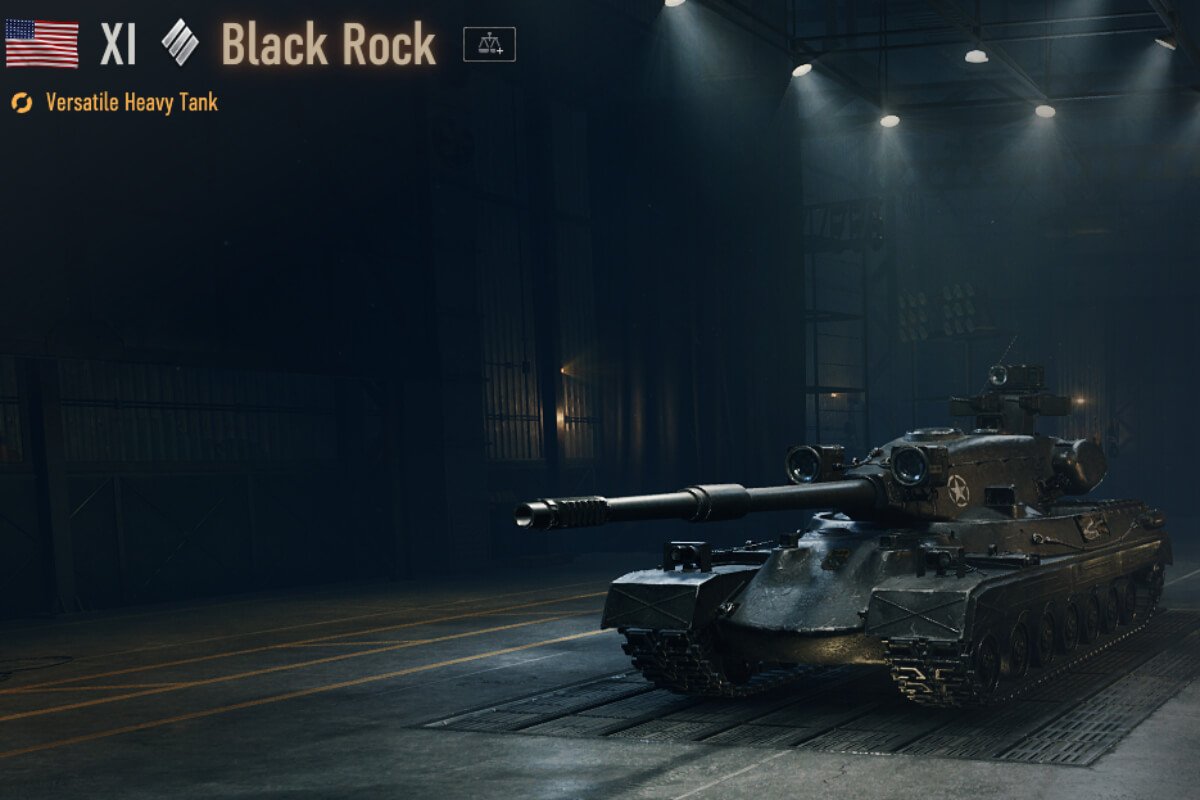
- Prestige Reward: A Tier XI American versatile heavy, obtainable only through Personal Missions 3.0 (Sector 3: Operation Black Rock).
- Signature Mechanic: Burst Mode — after two penetrating hits, your next shot loads a two-shell cassette that fires in rapid succession.
- Hull-Down Strength: 330 mm turret armor with −8° gun depression makes it nearly untouchable in ridgeline fights.
- Weaknesses: Exposed lower plate, vulnerable turret cheeks when angled, and reliance on landing two pens before Burst Mode.
- Grind Factor: Community math suggests ~12,000 campaign points for completion—making it the hardest mission reward in the set.
Identity & Positioning — What Makes Black Rock Different
Black Rock appears in Tankopedia as a USA Tier XI versatile heavy and is explicitly tagged as a reward vehicle, which means no research costs and typical reward-vehicle perks (e.g., credit/XP bonuses in certain modes). More importantly, WG’s Tier XI overview states that most Tier XI vehicles are direct successors to Tier X lines, but Black Rock is the exception as the Personal Missions prize. That status drives scarcity and prestige; it also shifts the acquisition path from “tech-tree XP” to “mission calendar.”
How to Earn It — Personal Missions 3.0 (Sector 3) Without the Guesswork
Earning the Black Rock Heavy is not a matter of silver or credits; it is about persistence in Personal Missions 3.0, specifically in Sector 3. This sector contains three operations, each representing a distinct role and reward: Windhund, Dravec, and Black Rock. To progress, players must complete daily missions, weekly tasks, and stage-based objectives. Each completion provides Campaign Points, which are then used to unlock vehicle parts. Once all parts are gathered, the Black Rock can be assembled in full.
Unlike previous mission campaigns where honors were mandatory for some stages, this system provides a built-in safety valve. If a mission proves too difficult, players can continue accumulating points and eventually advance. For example, aspirational missions requiring massive single-game damage are still present, but these are not strict requirements for the Black Rock.
This flexibility allows steady grinders to keep pace even without high-skill feats. Players should approach the campaign like a weekly job: log in, complete dailies, collect weeklies, and let the points stack. This slow but consistent pace prevents burnout and guarantees eventual progress. Sector 3’s flexibility and tier range (VIII–XI) encourage diverse lineups, reducing bottlenecks and letting players use tanks they are already comfortable with.
Practical grind tips:
- Calendar first: Treat the mission board like a job with deadlines. Daily and weekly completions guarantee long-term momentum and steady Campaign Point accumulation.
- Spike missions optional: High-damage or skill-intensive missions mostly reward cosmetics or bragging rights. You can bypass them and still complete the campaign through consistent point accumulation.
- Tier flexibility: Black Rock missions accept Tier VIII–XI vehicles. Use tanks best suited to each requirement to avoid queue mismatches and wasted attempts.
Burst Mode Explained — The Two-Pen Trigger and the Two-Shot Payday
The defining feature of the Black Rock Heavy is its Burst Mode, a mechanic unique to this reward tank among heavies. The mechanic activates after two successful penetrating hits. Once primed, the very next shot transforms into a two-round rapid-fire cassette. This essentially converts a conventional single-shot heavy tank into a situational autoloader for one sequence.
The benefit is immediate: compressed damage output in the span of a single exposure. A well-placed burst can cripple an overconfident opponent, punish double peeks, or secure two kills back-to-back. The mechanic emphasizes accuracy and discipline more than raw damage per minute. If a shot bounces or is absorbed by spaced armor, the priming sequence resets, costing valuable time. This creates an additional skill layer for Black Rock players, as simply firing at anything in sight will not pay off. Instead, players must deliberately target weakspots or soft vehicles to secure the two necessary penetrations.
Once primed, timing becomes critical. A poorly chosen cash-out wastes the burst potential, while a well-executed one can swing an entire engagement. Burst Mode therefore defines both the ceiling and the floor of the Black Rock’s gameplay, rewarding patient, deliberate setups and punishing careless aim.
What Burst Mode Means for Your Fights
Burst Mode changes the entire rhythm of how the Black Rock Heavy plays engagements. Setup is everything. The first two penetrating hits should be treated as an investment, and careless exposure that leads to bounces wastes the cycle. Unlike a tank with a static clip or drum, this system demands players actively shape opportunities to build momentum. When primed, the tank’s burst allows trades that most heavies cannot replicate. Two shells delivered in quick succession mean that a standard corner exchange where you would expect to trade evenly now heavily favors the Black Rock. This makes the vehicle a punisher in scenarios where enemies misjudge exposure times.
At the same time, the counter-play is obvious. A well-angled superheavy can prevent priming by forcing bounces, and targets with layered armor may stall your sequence. This creates a dynamic where Black Rock drivers must carefully choose who to shoot at first. Against thinly armored mediums or inattentive heavies, the burst sets up perfectly. Against experienced players who understand the mechanic, the Black Rock can feel like a standard single-shot heavy until openings appear. This duality makes Burst Mode situational yet devastating when used with intent and precision.
Core Specs, Handling & Where the Numbers Live
On paper, the Black Rock Heavy presents itself as a well-rounded Tier XI heavy with an edge in turret armor and gun comfort. Its 2,400 hit points place it in line with other endgame heavies, while the 114 mm M73 gun provides solid alpha at 420 damage per shot with armor-piercing or APCR rounds. Penetration values of 278 mm with standard shells and 330 mm with premium ammunition allow it to contest even hardened superheavies when well-aimed.
The 0.33 m dispersion and 2.01 second aim time give the gun a reliable profile, making the tank well-suited to weakspot targeting necessary for Burst Mode activation. Mobility is supported by a power-to-weight ratio over 17 hp/t, which ensures it reaches ridgelines faster than bulkier peers, even if the top speed of 43 km/h is only average. The turret is the standout armor piece with 330 mm of protection, though it becomes vulnerable when angled or when the cheeks are exposed.
The hull’s 172 mm front plate is workable but not impenetrable, and the lower plate is a frequent weakspot. Overall, the Black Rock mixes strong gun reliability and turret resilience with average hull protection, balanced to emphasize hull-down play.
Armor & Positioning Notes (Game Sense, Not Hype)
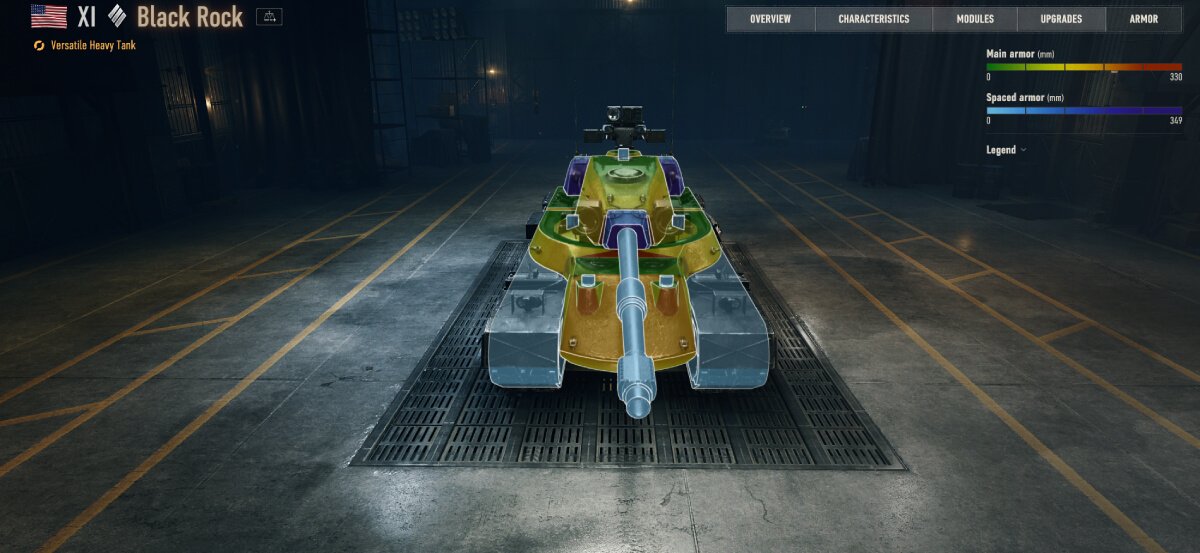
Armor behavior on the Black Rock Heavy reinforces its hull-down specialization. The turret is capable of shrugging off most standard rounds, especially when angled directly at opponents. Gun depression of −8° allows effective ridge fighting, letting the Black Rock expose only its strongest armor. However, the lower plate is consistently vulnerable, particularly to premium ammunition, and should be hidden whenever possible. The turret cheeks flatten out if the turret is rotated even slightly, exposing a major liability similar to vehicles like the Concept 1B. This makes turret discipline critical: keep the turret aligned to the enemy when expecting return fire.
Sidescraping is not effective because of weak side plates and the tank’s profile. Lucky bounces may occur, but relying on them leads to disappointment. The correct approach is to secure ridgelines, force opponents to engage your turret face, and minimize hull exposure. In static attrition fights, the hull may collapse under sustained fire, so constant repositioning and ridge play are essential. In practice, the tank thrives in maps with terrain features to exploit and struggles when forced into flat, open duels. Positioning discipline determines whether the armor works as an asset or an Achilles’ heel.
Playstyle Blueprint — Turning Conditions into Control
The Black Rock Heavy’s playstyle is all about turning conditions into reliable control. The mechanic dictates the tempo: you cannot simply drive forward and expect damage output like a brawler. Instead, you plan engagements around Burst Mode activation. Early in a battle, prioritize ridges or structured corners where you can safely land the first two penetrations. At this stage, patience is key—forcing unreliable shots wastes time and removes momentum. Mid-game is where the Black Rock shines. Once Burst Mode is primed, coordinate punishes with teammates or capitalize on overpeeks by enemies. Two shells delivered in under two seconds can erase careless opponents or cripple pushes.
This makes Black Rock particularly deadly in support of allies, as it can swing duels heavily in favor of its team. In the late game, the burst transforms into a carry tool. With reduced HP pools, you can reliably finish multiple one-shots or swing trades against stronger but slower heavies. However, the cycle demands caution. Overusing bursts in poor situations leaves you exposed with no payoff. The best Black Rock drivers treat the mechanic as a tool to dictate fights, not a guarantee of damage in every exposure.
Equipment & Crew — Built for Reliable Priming
Equipment (baseline builds that fit the mechanic)
Choosing equipment for the Black Rock Heavy should focus on ensuring consistent penetration to trigger Burst Mode. A Vertical Stabilizer is essential, reducing bloom during peeks and improving on-the-move accuracy, which is crucial for the first two setup shots. An Improved Aiming Unit further tightens shot circles, allowing more reliable weakspot targeting. The third slot depends on lobby context. A Turbocharger helps reach ridges faster and maximizes the strong power-to-weight ratio, making map control easier. Alternatively, Improved Hardening provides extra durability for attrition-heavy fights where survival is more valuable than speed.
Tier XI upgrades complement these equipment choices, as upgrades offer direct buffs without trade-offs. Prioritize gun handling nodes first to strengthen the priming sequence, followed by survivability nodes for consistency in prolonged hull-down battles. Burst Mode mastery should come after fundamentals are covered. Together, these equipment and upgrade choices make the Black Rock less about gambling for bursts and more about reliably securing them whenever opportunities appear. Every module should serve the overarching goal: land those two penetrating hits and unleash the punishing two-shot burst with confidence.
Crew Skills (priority order)
Crew skill selection further amplifies the Black Rock’s strengths and shores up its weaknesses. For the commander, Sixth Sense remains a universal first choice, followed by Recon to expand view range and Jack of All Trades for flexibility in battle. The gunner benefits most from Snap Shot to improve turret traverse accuracy and Designated Target to punish exposed enemies. The driver should prioritize Smooth Ride to stabilize shots while moving and Clutch Braking to improve traverse, vital for maintaining hull-down positioning against fast opponents. For the loader, Safe Stowage reduces the chance of ammo rack damage, which can be crippling, while Intuition allows faster shell type swaps.
Intuition is particularly valuable in the Black Rock because Burst Mode follows the shell type loaded when triggered, meaning a poorly chosen round can waste the burst. With this skill, players can pre-plan engagements more effectively. Overall, the crew build should align with the same philosophy as equipment: improve consistency in landing the two priming shots, stay alive long enough to repeat the cycle, and maximize the payoff when Burst Mode activates. Proper crew development enhances the tank’s identity as a precision-driven heavy.
Matchups & Map Micro — Where Black Rock Prints Value
Ridge & Urban Corners
On ridgelines and urban corners, the Black Rock Heavy becomes a punisher. Its turret armor combined with −8° depression allows it to peek safely, line up two penetrations, and then cash out the burst. Short peeks that appear even trades to the enemy often turn into massive HP swings when the burst unloads. A particularly effective tactic is using the first burst shell to track an enemy and the second to hit their exposed weakspot before repairs. This makes ridge and corner play the foundation of the tank’s strategy. However, positioning discipline is vital. Exposing too much hull risks the weak lower plate, and angling the turret incorrectly flattens the cheeks.
Proper use of cover, ridge crests, and turret control is the difference between a devastating burst and an early trip back to the garage. On urban maps, the Black Rock can perform well by anchoring lanes with allies, punishing anyone who misjudges exposure times, and leveraging its burst to win out trades it would otherwise break even on. These scenarios highlight why the tank is described as a versatile heavy, capable of flipping duels on timing alone.
Armor Walls & Superheavies
Against armor-centric opponents such as Maus or Taschenratte, the Black Rock Heavy faces its greatest challenge. The Burst Mode mechanic requires successful penetrations to activate, but angled superheavies often bounce shots that reset the cycle. In these cases, the Black Rock should avoid attempting to prime against such targets directly. Instead, use softer opponents to build the burst and then apply the damage against superheavies once the cassette is ready.
Terrain manipulation also plays a role; using downward slopes to force shots into upper plates can improve penetration chances. However, in flat exchanges, even premium shells may struggle. This makes matchup selection crucial. Attrition fights against walls of armor are not where the Black Rock shines. Its strength lies in punishing opportunistic exposures, not grinding against opponents designed to absorb fire endlessly. When faced with armor-heavy lobbies, adapt by repositioning, supporting flanks, and saving the burst for finishing blows rather than relying on it as a primary damage dealer. This situational limitation ensures the Black Rock is strong but not overpowering, fitting its role as a precision-dependent Tier XI reward heavy.
Mobile Lobbies & Open Maps
In faster-paced battles or on open maps, the Black Rock Heavy benefits from its surprisingly strong power-to-weight ratio and mobility. While its top speed is not the highest among Tier XI heavies, its acceleration and climbing ability allow it to reach ridges and elevated positions effectively. This mobility ensures it can contest key terrain early, often arriving before slower heavies. Once in position, it transitions smoothly into its hull-down role.
On open maps, pairing with vision control allies like light or medium tanks maximizes effectiveness. The Black Rock can remain unspotted longer, using cover to prime Burst Mode safely. Its view range is competitive, especially with Recon and upgrades, allowing it to contribute to spotting when needed. Mobile lobbies also create more opportunities for opportunistic bursts, as mediums and lights often overextend or misjudge exposure windows. In these environments, the Black Rock transitions from a methodical ridge fighter into a flexible support heavy, punishing fast opponents who rely on quick peeks. While its size and armor prevent it from being stealthy, its mobility ensures it can respond dynamically to shifts in battle and remain relevant throughout a match.
Upgrades — Building the Black Rock Heavy to Full Power
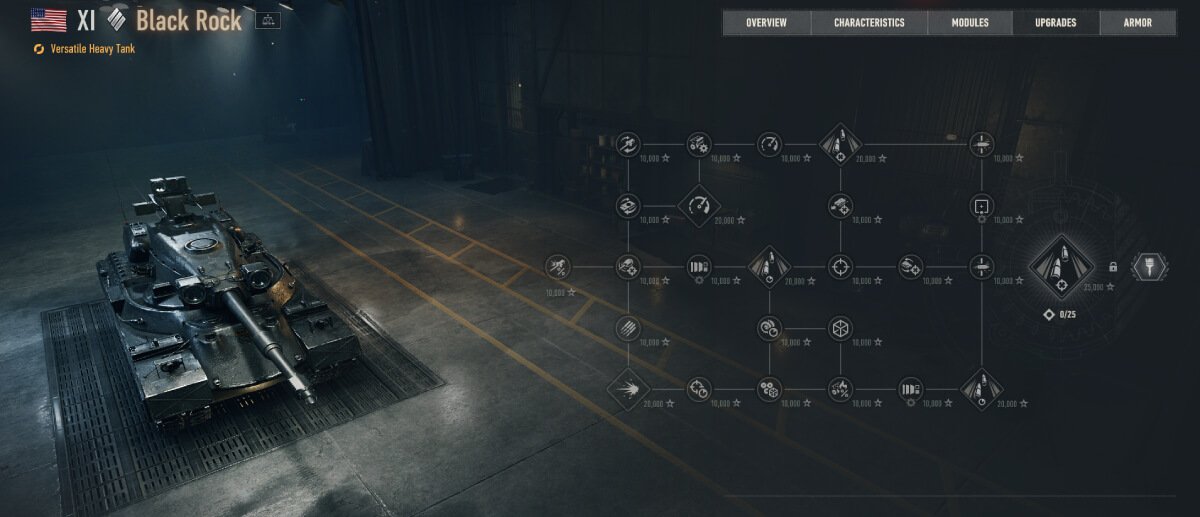
The Black Rock Heavy benefits from the Tier XI Upgrade system, which replaces the old Field Modifications with a structured, modular tree. Each upgrade node costs between 10,000 and 25,000 points, rewarding steady play over time. Unlike older systems, there are no trade-offs; every unlocked node is a permanent buff that layers onto the tank’s core strengths. The available upgrades focus on several categories: gun handling, survivability, mobility, reload speed, and utility. Gun handling nodes improve stabilization, aim time, and post-firing dispersion, directly increasing the consistency of landing the two priming shots needed for Burst Mode.
Survivability nodes add hit points, module resilience, or repair speed, helping the tank withstand punishment in hull-down positions. Mobility upgrades enhance engine output and terrain resistance, making it easier to reach ridges early and reposition as needed. Advanced reload nodes shorten downtime between shells and improve burst reliability. Finally, utility upgrades provide boosts to view range and radio effectiveness, which matter on open maps. This structure makes the upgrade system flexible in the short term but absolute in the long term, since all nodes are eventually unlockable, ensuring the Black Rock reaches peak strength over time.
Key Upgrade Categories
The upgrade tree branches into distinct paths that cater to different phases of the Black Rock Heavy’s playstyle. Gun handling nodes should be considered first, as they directly impact the reliability of Burst Mode. Faster aim time and tighter accuracy shrink the chance of bouncing or missing the two setup shots, ensuring bursts are primed regularly. Survivability upgrades are the second priority, as they extend the tank’s presence on ridges and in protracted duels. Increased repair speed and improved module durability mean less downtime after taking critical hits.
Mobility upgrades serve as a flexible option for players who prioritize map control; the added engine power helps contest key ridges earlier and exploit terrain advantages. Damage output upgrades, such as reload reductions and burst reload enhancements, increase overall lethality, making each successful Burst Mode sequence more punishing. Utility nodes like view range are situational but useful in vision games, giving Black Rock an edge in spotting or supporting scouts. Taken together, the categories highlight the tank’s design philosophy: it is not about specializing in one extreme but about gradually becoming more rounded, reliable, and powerful in every aspect of its gameplay.
Final Node — Burst Mode Mastery
The culmination of the Black Rock’s upgrade tree is the Burst Mode Mastery node, which requires 25,000 points to unlock. This enhancement focuses directly on the mechanic that defines the tank, reducing the time between the two burst shots and lowering dispersion on the second round. The result is a more seamless and devastating burst sequence, with both shells landing reliably before opponents can react. This node amplifies the punishing potential of the Black Rock, turning an already threatening mechanic into one of the most decisive swing tools available at Tier XI. While the investment is steep, the payoff is fitting for a capstone reward.
It ensures that once fully upgraded, the Black Rock not only remains relevant in hull-down fights but can deliver bursts that feel nearly impossible to counter if set up correctly. Importantly, this node cements the Black Rock’s identity as a precision-based heavy that evolves into an apex predator over time. For players committed to the grind, reaching this point represents both mechanical mastery and long-term progression, marking the full realization of the tank’s design vision as a reward vehicle.
Upgrade Path Tips
Players should approach the upgrade tree with a disciplined plan. The first priority should be gun handling improvements, as they directly enable consistent Burst Mode activations. Without them, the tank’s defining mechanic feels unreliable, and missed shots drag down performance. Survivability upgrades should follow, ensuring that the Black Rock can sustain prolonged ridge fights where its turret is the main defense. Durability also ensures fewer setbacks from damaged modules or extended repair times. The final node focused on Burst Mode should be saved until after fundamentals are in place, as it amplifies an already functional mechanic rather than fixing weaknesses. Mobility and utility nodes can be slotted in flexibly depending on personal preference or map demands.
Over time, all nodes will be unlocked, meaning the order is primarily about short-term comfort and efficiency rather than permanent trade-offs. This progression ensures that every Black Rock eventually reaches full power. Once maxed, the vehicle combines consistency, survivability, and a devastating Burst Mode into a single package, transitioning from a strong reward heavy into one of the most formidable Tier XI vehicles available in World of Tanks.
Is Black Rock “Meta”? Early Signals with Sensible Caution
Early signs suggest the Black Rock Heavy has strong meta potential, but its strength is conditional rather than automatic. WG markets it as the ultimate prize of Sector 3, and community showcases reinforce this framing by highlighting massive damage games where Burst Mode flips trades decisively. However, the mechanic demands precision, which prevents the tank from being overbearing in all hands. In lobbies where players aim carefully, the tank feels oppressive, with bursts capable of deleting enemies before they react. In contrast, less disciplined drivers may find it underwhelming if they cannot consistently secure two penetrations.
This duality positions Black Rock as a high-skill, high-reward tank rather than a universally dominant vehicle. It thrives in ridge-heavy maps where its turret and gun depression shine but struggles against walls of armor that stall Burst Mode. As with any new introduction at Tier XI, balance adjustments may follow, and numbers could be tweaked to ensure fairness. For now, the Black Rock is not just competitive—it is a prestige vehicle that rewards those willing to master its conditional mechanic, making it relevant in both performance and symbolic value within the Tier XI meta.
Hands-On Checklist — Turning Theory into Extra Wins
To maximize performance in the Black Rock Heavy, players should follow a checklist of practical habits rooted in its mechanic. First, prime on purpose: identify softer targets or weakspots and secure the two penetrating hits before looking for larger opportunities. Avoid wasting shells on low-percentage shots that reset the cycle. Second, spend with intent: unleash bursts when they can change the outcome of a lane, cripple an anchor heavy, or punish multiple enemies who expose simultaneously.
Treat the burst as a high-value tool, not a casual damage option. Third, protect the reset: if the fight disperses, reposition instead of gambling on desperation shots that risk bouncing. Fourth, adapt to the map pool: ridgelines and hull-down positions maximize the Black Rock’s advantages, while flat lanes demand more caution and teamwork. Finally, synchronize with allies, as coordinated bursts paired with crossfires often create decisive trades. Following these principles makes the Black Rock a controlled powerhouse, rather than a gimmick reliant on chance. The mechanic is unforgiving to sloppy play but extremely rewarding for those who approach it with precision, patience, and discipline in every engagement.
Black Rock — Tier XI U.S. Reward Heavy Tank (Full Stats)
| Category | Base Specification | Upgraded Specification |
|---|---|---|
| Nation / Type / Tier | USA / Versatile Heavy Tank / Tier XI (Reward Vehicle) | USA / Versatile Heavy Tank / Tier XI (Reward Vehicle) |
| Hit Points | 2,400 | 2,450 |
| Weight | 55 t | 55 t |
| Engine | Continental AVDS-1790-8BR, 950 h.p., 20% fire chance | Continental AVDS-1790-8BR, 1,000 h.p. |
| Power-to-Weight Ratio | 17.27 h.p./t | 18.18 h.p./t |
| Top Speed (fwd/rev) | 43 / 14 km/h | 45 / 14 km/h |
| Traverse Speed (Hull) | 34.42 °/s | 35 °/s |
| Traverse Speed (Turret) | 36.5 °/s | 37 °/s |
| Suspension Repair Time | 11.7 s | 9.75 s |
| Armor (Hull) | 172 / 89 / 51 mm (front / side / rear) | 172 / 89 / 51 mm (front / side / rear) |
| Armor (Turret) | 330 / 121 / 76 mm (front / side / rear) | 330 / 121 / 76 mm (front / side / rear) |
| View Range | 400 m | 400 m |
| Signal Range | 800 m (AN/GRC-7BR radio) | 800 m (AN/GRC-7BR radio) |
| Concealment (%) | 5.59 / 1.01 (stationary) — 2.79 / 0.5 (moving) | Unchanged |
| Gun | 114 mm Gun M73 | 114 mm Gun M73 |
| Alpha Damage | 420 / 420 / 530 HP (AP / APCR / HE) | 430 / 430 / 540 HP (AP / APCR / HE) |
| Penetration | 278 / 330 / 57 mm | 283 / 335 / 57 mm |
| Reload Time | 10.07 s | 10.50 s |
| Rate of Fire | 5.96 rounds/min | 5.71 rounds/min |
| DPM | 2,503 HP/min | 2,457 HP/min |
| Dispersion (100 m) | 0.33 m | 0.33 m |
| Aiming Time | 2.01 s | 2.0 s |
| Gun Depression / Elevation | –8° / +20° | –8° / +20° |
| Ammo Capacity | 60 shells | 60 shells |
| Burst Mechanic | Burst Mode — after 2 penetrating hits, the next shot loads a 2-round cassette fired in rapid succession. • 2 penetrations to activate • 2 shells in cassette • ~1 s intra-clip reload • ~70% reduced dispersion on second shot | Burst Mode (Enhanced) — 2 penetrating hits still trigger the 2-round cassette. Reload between shells is shortened (~1 s), second shot accuracy further improved, ensuring tighter bursts and higher damage reliability once upgraded. |
Acquisition Reality — Planning the Calendar
Obtaining the Black Rock Heavy is a marathon, not a sprint, and players must approach it with the right mindset. Sector 3 of Personal Missions 3.0 is structured to feed progress gradually through daily missions, weekly tasks, and stage objectives. Each of these contributes Campaign Points, which are then converted into vehicle parts that eventually assemble the tank. While honors clears accelerate the process, they are not required for completion, and this flexibility is intentional.
Players who cannot consistently meet aspirational goals like extremely high single-game damage can still progress steadily by banking routine missions. Third-party discussions and community math often highlight just how long the journey is compared to the other two Sector 3 rewards, with Black Rock demanding the most Campaign Points and time investment. This means the vehicle is designed to be rare and prestigious, rather than quickly accessible.
The reality is simple: treat it like a calendar-driven project, where steady engagement pays off more than sporadic bursts of play. Black Rock is not meant to be rushed, but earned through commitment to cadence. Over weeks and months of consistent effort, the parts accumulate, and the final reward is secured without unnecessary burnout.
Why This Tier XI Heavy Is Worth the Work
The Black Rock Heavy represents a deliberate design choice by Wargaming to reward precision, patience, and dedication. Mechanically, the tank embodies its philosophy: land two penetrations first, then unleash a burst that compresses damage into a short window and flips trades decisively. This mechanic makes the vehicle both powerful and skill-gated, preventing it from being a simple point-and-shoot reward. On the access side, the tank is tied exclusively to Sector 3 of Personal Missions 3.0, making it far scarcer than Tier XI tech-tree successors. There is no experience grind shortcut; players must commit to the campaign structure and accept the long timeline.
This scarcity increases its prestige and ensures that it remains a rare sight in battles. For those who commit to the grind and learn its unique rhythm, the payoff is clear. In the right terrain and with proper discipline, Black Rock becomes a late-game powerhouse capable of swinging battles. It is not about volume of fire, but about timing and precision. As such, the Black Rock Heavy stands as one of the most desirable rewards in the current system, combining exclusivity, unique gameplay, and the satisfaction of mastering a demanding mechanic.


