 Skip to content
 Playing heavy tanks in World of Tanks isn’t button-mash fun—it’s a high-stakes chess match in armor. You’ve got a mobile bunker, a massive gun, and a tank full of opportunity—but also vulnerability if misplayed. Too many players see heavies as “shoot and tank”—leading to overextension, wasted potential, and frequent flippenings into enemy traps.
You’re right in the thick of it, circling ridge after ridge, only to eat premium rounds in spots you thought were safe. Or worse—you charge solo and get deleted by arty or flanked by TDs. It’s rage-inducing and brutal.
This guide breaks down proven tactics, gear setups, playstyles, and mindset. No fluff—just actionable intel that turns your heavy from a rolling meat-shield into a battlefield commander.
TL;DR – Key Takeaways
- Pick the right subtype: true tank, balanced, or glass cannon to match your map and role.
- Angle smart, sidescrape, go hull‑down—learn to bounce shells like a boss.
- Gear & crew matter: Rammer, Vertical Stabilizer, Spall Liner + Sixth Sense, Repair, Brothers‑in‑Arms are musts.
- Map awareness wins games—push early, retreat smart, hold flanks, and clean up late.
- Mind your gun: high-alpha tanks shoot then reset; autoloaders burst then reposition.
Choose Your Heavy Subtype: What Fits You?
Heavies fall into three main flavors—each demands a different mindset:
-
True tanks (e.g. Maus, Pz.Kpfw VII): Ultra‑tanky, glacier‑slow. Designed to absorb punishment, dominate chokepoints, and bully mediums. These steel giants are purpose-built for front-line brawling. Their role isn’t to chase light tanks or flex across the map, but to lock down the enemy’s strongest route and hold it. With monstrous HP pools and almost impenetrable frontal armor, they’re the tip of the spear in any push. Use them to soak damage for teammates, push choke points, and face enemy guns head-on. But beware—because they’re painfully slow, poor map awareness or overcommitting can get them surrounded and farmed by mobile enemies. Always pair with support, especially on open maps where TDs and arty can rip them apart from range.
-
Balanced bruisers (e.g. IS‑7, T110E5): Armor + mobility + decent firepower. Flexible and perfect for repositioning during pushes. These tanks are the jack-of-all-trades heavies. They can frontline if needed, angle armor to bounce shots, and then rotate to another lane before slow tanks even cross mid. While not as indestructible as true heavies, their speed and reliability let them adapt better to shifting fights. A T110E5, for instance, can take a hit, return fire accurately, and back out to safety. Their flexibility makes them great for players who enjoy reading the map and shifting roles—sometimes anchoring, sometimes flanking, sometimes defending. They reward game sense and quick decisions more than brute force.
-
Glass cannons (e.g. AMX 50 100/120): Fast, burst damage kings with weak armor. Flank, fire, and fade before getting focused. These heavy tanks are built to strike, not tank. They rely on their speed to reposition and their powerful autoloaders to devastate distracted opponents. One good clip from a 50 120 can erase a full-health medium—but if you linger, your armor won’t save you. Instead of leading charges, these heavies support from behind, pounce on isolated enemies, or finish off targets during chaos. Use terrain and teammates as cover, never engage alone, and always have an escape route. Play them like sneaky bullies—poke, punish, disappear.
Armor Mastery: Bounce, Angle, Dominate
Your armor is your biggest weapon—if you use it right:
Angling & Sidescraping
Angling and sidescraping are the bread and butter of heavy tank survivability. When a tank turns its hull at a 30 to 45-degree angle, the armor effectively becomes thicker due to the angle of impact, increasing the likelihood of a ricochet. Proper angling can make even mediocre armor formidable. Sidescraping takes it further by allowing you to peek around corners while exposing only your thick tracks and angled side armor. This technique is best used on flat-fronted tanks like the German E-75. Reverse sidescraping works wonders with pike-nosed tanks like the IS-3, where backing into a position lets the angled nose bounce shells more consistently. Mastering these techniques means you’ll often come out ahead in trades, forcing enemies to waste shots or load premium rounds to penetrate. Always choose positions where you can use these tricks effectively—urban environments are your best friend.
- Turn your hull at 30–45° to deflect shells efficiently.
- Sidescraping: use cover to reveal only spaced tracks—ideal for flat-front tanks.
- Reverse sidescraping: park rear-first near cover, bait shots with pike noses (IS series).
Hull‑Down Play
Hull-down tactics are when a tank uses terrain or hard cover to hide its hull, exposing only the turret to enemy fire. This is crucial for tanks with strong turret armor, such as the American T29 or the British Centurion series. In a hull-down position, you minimize your exposure while still being able to fire. This greatly increases survivability, especially against tank destroyers and artillery. Look for terrain dips, ridge lines, or debris to set up these plays. For maximum effectiveness, wiggle the turret slightly to prevent enemy shots from easily targeting weak points like cupolas. The more you practice these setups, the more confidently you can hold aggressive angles or defend critical locations without taking damage.
- Expose only your turret—great for tanks like the T29 or T32 with armored domes.
Know Your Weak Spots
Every heavy tank, no matter how armored, has weak points. Understanding these vulnerabilities is the key to staying alive longer in engagements. Common weak spots include the lower glacis plate (the bottom front part of the tank), cupolas (the commander’s hatch on the turret), and thin side or rear armor. When facing opponents, be aware that experienced players will aim for these areas automatically. To reduce your chances of getting penetrated, never show flat surfaces directly to the enemy. Always keep moving, wiggle your hull, and use hard cover to block shots aimed at these zones. Also, avoid cresting hills in a way that shows your underbelly—especially to artillery and high-penetration guns. Protecting your weak spots is what separates a bouncing beast from a wrecked wreck.
- Watch your lower glacis, cupolas, and sides.
- Always assume you’re being aimed at by someone smarter than you think.
Loadout & Crew: Gear Up for Impact
Equipment Essentials
Picking the right equipment transforms your heavy tank from decent to devastating. A Gun Rammer is a must-have for nearly every heavy—it cuts down reload time, letting you shoot more often and out-trade slower tanks. Pair it with a Vertical Stabilizer to fire more accurately while moving or adjusting your aim. This combo increases your shot output and reduces wasted damage potential. For the third slot, your choice depends on the tank’s role.
If you’re often brawling, a Spall Liner will reduce damage from artillery, HE shells, and ramming. On the other hand, Coated Optics is useful on more flexible heavies, helping you spot enemies before they spot you—an edge when you’re not playing on the front lines. Choosing between these depends on the map, your playstyle, and the tank’s natural strengths. Smart loadouts elevate average players into battlefield threats.
- Gun Rammer: Reduces reload time.
- Vertical Stabilizer: Improves accuracy on the move.
- Spall Liner or Coated Optics: Mitigates arty/TDer splash or boosts view range.
Consumables
Consumables are non-negotiable when playing heavy tanks at any tier. The holy trinity—Repair Kit, Medkit, and Fire Extinguisher—should always be equipped. Heavy tanks are priority targets and often find themselves tracked, set on fire, or suffering crew injuries. A Repair Kit ensures you’re not immobilized when your tracks are blown off. A Medkit lets you recover from critical crew losses—especially if your gunner or loader goes down. And the Fire Extinguisher is your insurance against fuel tank damage or engine fires that would otherwise burn away your HP in seconds. Premium consumables provide faster cooldowns or automatic activation, but even standard ones are essential.
Use them wisely: repair tracks when behind cover, extinguish fires immediately, and treat crew injuries that affect reload or aim speed. It’s not just about surviving—it’s about staying in the fight and hitting back hard.
- Always carry a repair kit, medkit, and fire extinguisher.
Crew Skills Priority
Your crew makes or breaks your tank’s combat performance. First, every commander needs Sixth Sense—it’s your radar for danger. Knowing when you’re spotted lets you avoid unnecessary hits. Next, prioritize Repair for all crew members. A heavy tank without functioning tracks is a sitting duck. After those, Brothers-in-Arms boosts overall crew efficiency if trained by all members. For gunners, skills like Snapshot improve accuracy on turret traverse. Drivers benefit from Smooth Ride for better accuracy on the move.
Together, these enhance your tank’s response time, survivability, and damage output. Don’t spread skills too thin—build them up one at a time. Retrain if needed once crew members hit 100%. Elite players fine-tune crew layouts specifically for the tank’s playstyle. Whether you’re anchoring the front line or pushing flanks, a skilled and synergized crew turns good tanks into match-winners.
- Sixth Sense (Commander) – lets you know when you’re spotted.
- Repair – mandatory for tracks and mobility.
- Brothers-in-Arms, Snapshot, Smooth Ride for performance buffs.
Map Awareness & Flow: Be Where It Counts
Opening Push
The opening push is the most important 60 seconds of any heavy tank match. What you do here sets the tone for the rest of the battle. You must commit fast to strong map positions—ridges, choke points, or city intersections—depending on your tank type. This early movement allows you to anchor lanes and block fast enemies from gaining map control. Delaying even 10–15 seconds can mean the difference between holding the high ground or being pinned down.
If you’re in a true heavy, make your way to a hull-down spot or sidescraping corner fast and hold it. Balanced heavies can take more flexible paths or support the strong side. Avoid passive starts. A heavy tank that fails to apply pressure early often becomes irrelevant before the match picks up. Success comes from decisiveness, position knowledge, and committing to a fight with backup.
- Get to ridges, cities, or choke points fast. Early momentum = map control.
Mid-Game Rotation
Mid-game is where you prove whether you’re a rock or a liability. At this point, battles start tilting—one side wins a flank, another collapses. As a heavy, you have to read the minimap constantly and be ready to rotate. If you’re holding and your allies are melting, disengage and reinforce. If your side is pushing, don’t blindly overextend—stay close to cover and be ready to support a failing teammate nearby. Always prioritize staying alive over greed for damage.
Relocating even 50 meters can let you crossfire an opponent or block a push entirely. Mid-game decisions should focus on preserving HP, controlling lanes, and denying momentum to the enemy. Be adaptive—your armor and gun only matter if you’re in the right place.
- Support broken flanks or hold positions. Don’t overstay if a side is collapsing.
Endgame Cleanup
The final phase of a match separates brawlers from closers. In the endgame, your heavy tank’s HP and armor become decisive. Use them to bait shots, lead pushes, and shield weaker allies. You’re not just soaking damage—you’re deciding trades. If you have HP, it’s your job to go in first and create a distraction. Always assess the risk: if multiple enemies can shoot you, wait. If it’s just one isolated TD or low-health tank, push aggressively. Clean up is also about being calm—don’t rush shots, and don’t tunnel on a kill if it exposes your side or rear. Smart armor use in these moments can win games outright. The heavies who play patient yet assertive during cleanup often walk away with the match-winning impact.
- Use your HP to soak final engagements. Clean low-health targets and trade smart.
Communication
Communication is your multiplier. It turns a decent heavy player into a tactical asset. Even if your team isn’t using voice chat, in-game commands and pings can communicate crucial information. When pushing, signal ‘Attack here!’ or ‘Follow me!’ to draw teammates into coordinated action. If you’re covering a flank alone, ping for help early rather than after you’re dead. Even just typing ‘hold left’ or ‘pushing city’ gives teammates a clear plan. A silent heavy is often ignored, but a vocal one can rally support and avoid misplays. You don’t need to micromanage the team—just be clear, early, and consistent with your calls. Good communication helps your team follow up, trust your lead, and turn disorganized fights into synchronized kills.
- Ping, type, or signal pushes—heavies win more when teams know your plan.
Pacing & Gun Handling: Every Shot Counts
Heavy tanks aren’t about constant spraying—they’re about choosing your shots wisely and trading efficiently. Tanks like the IS-3, IS-7, and T29 are built around high-alpha guns that hit hard but take time to reload. When you fire, reposition or go dark while reloading. Poking twice into an enemy gun while your reload ticks down is asking for punishment. Time your shots, bait enemy fire, then counterpunch.
On the flip side, autoloading heavies like the AMX 50 120 or Kranvagn work on a different rhythm. They burst damage fast, then retreat to reload. Never sit in the open post-burst—always have a fallback spot. These burst tanks need terrain and teammates to survive. Picking the right engagement range is also key. Mid-range hull-down play lets you leverage strong turrets. Close quarters favor brawling heavies who can sidescrape and angle efficiently. Long-range engagements are rare, but some fast heavies can flex there with surprise flanks. Gun discipline, reload awareness, and spatial awareness turn heavy tanks from clunky targets into lane-dominating threats.
- High-alpha guns like IS-3 deliver punishing trades. Don’t peek twice during reload.
- Auto-loaders should burst, pull back, reload, repeat—never sit open.
- Pick the right range—hull-down at mid, sidescrape up close, flank long when needed.
Common Pitfalls: What Kills You
Even well-armored beasts die fast when played carelessly. The most common mistake? Overexposing your tank’s flat frontal armor. Many players drive straight at enemies without angling or cover, thinking raw HP will save them. It won’t. If your front plate is flat and visible, you’re asking to get penned every time. Another deadly error is trying to lone-wolf down multiple flanks. Heavy tanks need team support—especially to protect their sides and rear.
Going solo means getting circled, flanked, and deleted. Reload management is another underrated pitfall. Many heavies have long reloads, and players who fire carelessly end up helpless mid-fight. Always track your reload time and position accordingly. Lastly, don’t sit still in open terrain. Artillery and tank destroyers feast on static heavies. If you’re spotted and not moving or behind cover, you’re a gift. Use hard cover religiously and keep adjusting your position. Being a heavy tank doesn’t mean you’re invincible—it means you’re valuable. Play smart and avoid these classic traps to last longer and deal more impact.
- Overexposing flat armor on the move.
- Trying to solo push into multiple lanes.
- Ignoring reload timers—especially dangerous for low-DPM heavies.
- Letting TDs and arty get line of sight while you’re static.
Nation & Tier Tips: How They Play
-
Soviet (IS series): Sloped armor, great brawlers, excellent sidescrapers. Soviet heavy tanks, especially the IS line, thrive in close-range engagements thanks to their sloped armor design, which increases effective thickness and bounce chance. These tanks are masters of reverse sidescraping and work best when brawling in cities or narrow alleys. Their high-alpha guns and decent mobility let them trade effectively and hold corners aggressively.
-
German (Maus, E-100): Huge tanks, great for holding city maps and absorbing pressure. German heavies like the Maus and E-100 are walking fortresses. Built for endurance, they perform best in urban maps where their bulk can block corridors and soak up enormous damage. These tanks are ideal anchors for pushing or holding a line but need strong map awareness to avoid being flanked or arty-sniped.
-
American (T110E5, T29): Hull-down heroes with laser-accurate guns. American heavies such as the T29 and T110E5 are hull-down specialists. With strong turrets and accurate guns, they excel when only the turret is visible to enemies. These tanks are best played from ridgelines, depressions, and cover-rich environments where they can peek and shoot without exposing their weak hulls.
-
French (AMX 50): Autoloading beasts—play fast and slippery. French heavies like the AMX 50 100 and 120 are autoloading speedsters. Their lack of armor is offset by fast movement and powerful burst potential. They function best as flanking supports—unload a clip into an unsuspecting target, then escape before taking return fire. They’re vulnerable solo, but deadly with timing and support.
-
British (FV215b): Reliable reloads, more flexible than expected. British heavies such as the FV215b bring steady DPM and good all-round stats. They’re not as tanky as others but compensate with accuracy and reload speed. Best used in dynamic roles—push when needed, hold when required. Use their consistency to punish enemies who overpeek or fail to reposition.
-
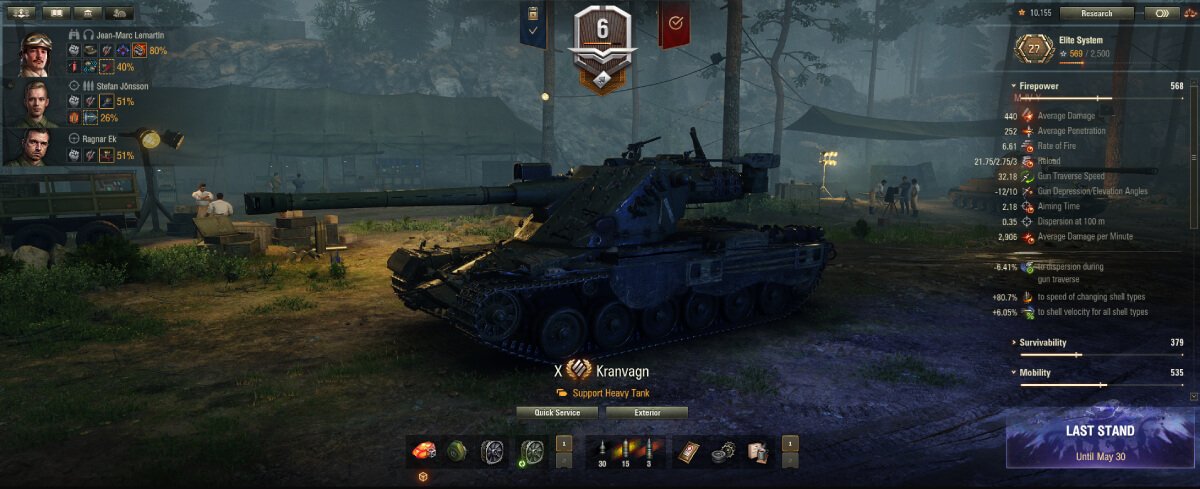
Swedish (Kranvagn): Burst-focused, hull-down tanks with dangerous autoloaders. Swedish heavies like the Kranvagn offer powerful burst damage from autoloaders paired with excellent turret armor. They’re perfect for hull-down gameplay, especially from behind ridges or uneven terrain. Play conservatively until your clip is ready, then punish and retreat while reloading.
Community & Expert Insights
World of Tanks has no shortage of advice, but real wisdom comes from experienced players who’ve put in thousands of battles. Community tips often focus on small tactical decisions that pay off big. One of the most shared insights is knowing when not to shoot. If all you can hit is a heavily armored cupola and you’re unsure of the pen chance, reposition or wait for a better angle—don’t throw away a shell.
Another critical mindset tip from veteran players: don’t play your heavy like a light with a big gun. Speed and recklessness will get you killed. Instead, lean into your armor and pick smart, sustainable fights. Official coaching videos like ‘Tank Coach’s Heavy Fundamentals’ on YouTube also dive deep into positioning, equipment setup, and shot selection. These resources provide nuanced tactics beyond the surface-level guides. Learning from others shortens your trial-and-error curve—and helps you make fewer expensive mistakes in battle.
- “If all you can do is snipe a cupola, then reposition or just wait.” – Reddit
- “Don’t play your heavy like a light with a big gun. Play smart, not fast.” – Steam forums
- Watch: Tank Coach’s Heavy Fundamentals on YouTube for breakdowns on positioning, angling, and modules.
Pro-Level Template: Heavy Tank Gameplay Walkthrough
The best heavy tank games follow a rhythm—and elite players know how to stick to it. It starts with preparation: gear up your tank with the right equipment and ensure your crew has critical skills like Sixth Sense, Repair, and Brothers in Arms. Once the match begins, heavies must push to early positions that matter—take map control, bounce some early damage, and prevent enemies from rushing key terrain. In the mid-game, flexibility is everything.
Watch the minimap, rotate to weak flanks, and back up teammates to plug holes or apply pressure. When the fight drags into late stages, your tank’s HP becomes currency. Use it smartly—shield allies, bait shots, and eliminate enemy guns. Good heavies stay relevant from start to finish. Stick to this step-by-step rhythm, and you’ll consistently top the scoreboard while leading your team to victory.
- Pre-battle: Equip top gear; crew trained for vision, reload, repair.
- Early game: Push to strongpoints, soak fire, hold lines.
- Mid-match: Shift where needed—don’t camp unless holding a lane.
- Endgame: Clean low-health enemies, block flanks, trade effectively.
Why Heavy Tanks Win Games
Heavy tanks win games not just by dealing damage—but by anchoring strategies. Their presence creates space, slows down enemy advances, and forces decisions. A properly positioned heavy can singlehandedly block a flank, hold a corridor, or absorb enough fire to let the team collapse another side. Their resilience isn’t just in their HP—it’s in their psychological impact. Players hesitate to peek corners or push lanes when they know a Maus or IS-7 is holding the line.
Beyond presence and resilience, heavy tanks are the most rewarding class when played smart. Good angling, reload management, and positioning turn these tanks into game-changers. And when supported well, their mix of armor and firepower can crush even numerically superior enemies. They don’t require the reflexes of a light or the vision of a medium—they demand planning, timing, and toughness. That’s why mastering heavies is often the fastest route to becoming a team-carrying player.
- Presence: They shape fights and zone enemies just by being there.
- Resilience: High HP pools and armor bounce shots to conserve lives.
- Strategic depth: Angling, shot pacing, and map awareness all reward good players.
Conclusion
Heavy tanks in World of Tanks are far more than slow-moving brutes with big guns—they’re tactical powerhouses that reward strategic play and battlefield awareness. Success with heavies comes down to mastering the nuances: proper angling, positioning with intent, managing your reloads, and knowing when to lead and when to fall back. These aren’t tanks for the impatient. They’re for players who want to control the pace of the match, influence map pressure, and absorb damage for their team while dishing out punishing blows.
If played recklessly, heavies become easy targets. But when played with discipline, they become the immovable object that defines the battlefield. Whether you’re holding a flank, anchoring a push, or soaking hits to give your allies the upper hand, every smart move you make in a heavy tank leaves a mark. Don’t just show up—make your armor matter. Learn the mechanics, lead with intent, and dominate every lane you touch.


