 Skip to content
 Tier X heavies settled into rinse-repeat trades: hull-down standoffs, corridor steamrolls, and Field Mod trade-offs that punished experimentation. Damage pacing felt predictable; one bad peek or a single clip could decide a flank, and lopsided class stacks could blow up a match before it started. Update 2.0 blows fresh air into that stale room by extending multiple lines to Tier XI and handing each heavy a bespoke mechanic—no gimmicks-for-penalties nonsense.
The new Upgrades path ditches trade-offs and stacks pure upside, so builds feel like progress, not paperwork. Suddenly, timing matters again: ramming windows that flip trades, partial-cassette chaining that keeps pressure live between bursts, twin-barrel salvos that rewrite peek math, auxiliary HE taps that force repairs and pin tracks, and jet-boost entries that seize map control before the first crossfire forms. It’s still World of Tanks, just sharper—more agency, clearer identities, and fewer coin-flip corridors. Tier XI doesn’t raise the roof; it tunes the tempo and hands heavy mains the metronome.

TL;DR
- Seven Tier XI heavies land: six tech-tree successors and the Personal Missions reward Black Rock. Each has a unique, skill-expressive mechanic.
- Unlock math per tech-tree Tier XI: 325,000 XP on the Tier X, then 7,400,000 credits to purchase.
- Tier XI skips Field Mods. Instead, linear Upgrades (small/large/final nodes) amplify handling and the tank’s signature mechanic—no downsides.
- Matchmaker treats Tier XI like Tier X: IX–XI lobbies with class/role limits to curb spam; more consistent battles for NA players too.
- Fresh details below integrate the latest official blurbs and client stat blocks for Taschenratte, KR-1, T803, AMX-67 Imbattable, FV4025 Contriver, BZ-79, and Black Rock.
Tier XI Overview: Why These Heavies Change the Rhythm
Tier XI heavies don’t try to out-stat Tier X across the board. They bend tempo. Auxiliary HE side-arms keep pressure during reloads; ramming configurations flip trades with impact damage; semi-auto reload stacks reward accuracy uptime; partial-cassette autoloaders turn four-shot drums into five-shot chains; twin-barrel salvos punish careless peeks; liquid boosters create “arrive-first” pressure. The Upgrades system locks in growth without the anxiety tax of negative trade-offs, and Elite status (after finishing the tree) adds cosmetics and a live stat tracker for flex value.
Tree Placement (Tech-Tree Successors)
- Germany — Taschenratte ← Maus
- U.S.S.R. — KR-1 ← IS-7
- USA — T803 ← T110E5
- France — AMX-67 Imbattable ← AMX 50 B
- UK — FV4025 Contriver ← FV230 Canopener
- China — BZ-79 ← BZ-75
- Reward (PM 3.0) — Black Rock (not a tech-tree successor)
Expect IX–XI matchmaking with role-aware class limits.
Upgrades That Boost You Forward
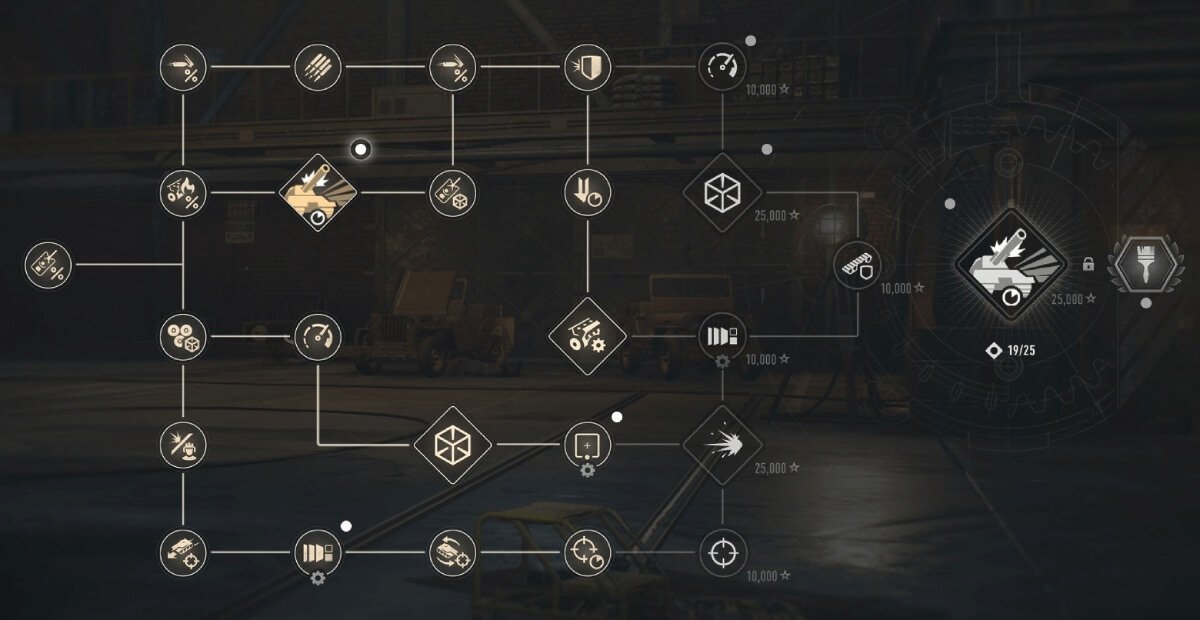
Tier XI introduces a refined upgrade experience that replaces Field Modifications known from lower tiers. Instead of picking between positives and drawbacks, the new progression path is linear and modular, designed around continuous improvement. Each node you unlock enhances your tank without compromise, ensuring steady growth that feels rewarding rather than risky.
Large nodes are dedicated to strengthening the vehicle’s unique mechanic—shorter auxiliary gun cooldowns, steadier Salvo dispersion, or faster booster recovery. Small nodes focus on comfort stats such as reload speed, accuracy, or mobility. Together, they let you sharpen your tank’s identity while smoothing out weak spots.
The difference from Field Mods is night and day: no more agonizing over which penalty to accept. At Tier XI, progress is always forward, and choosing where to invest first becomes a strategic decision tied to your preferred playstyle.
Tier XI Heavy Tanks — Roles, Mechanics, and Practical Play
Germany — Taschenratte (Tier XI Superheavy with Auxiliary Firepower)
The Taschenratte is Maus’s hulking successor: massive, slow, and absurdly resilient. Its twist? Dual auxiliary HE cannons that can fire independently while the main gun reloads.
Think bunker-on-tracks: 3,300 → 3,500 HP, thick all-round armor (hull 185/190/190 mm; turret 250/230/220 mm), and a main gun that hits for 520 alpha (510 → 520) with 268/330/66 mm pen. Handling is better than it looks—0.36 → 0.35 dispersion and 2.1 → 1.9 s aim—though the 13.8 s reload sets the cadence.
The trick is the Auxiliary Gun System: two HE secondaries on an independent cycle you can pop during the main reload to break tracks, finish 1-shots, or force repair kits on demand.
- Mobility: glacial. 20/15 km/h, 1,900 → 2,000 hp, 9.5 → 10 hp/t, hull traverse 15°/s, turret traverse 16°/s.
- Vision: 400 m. Camo is basement-tier—plan to be lit.
- Upgrade payoff: lowers aux-gun cooldown and tightens handling, so your “track + punish” loop gets nastier the longer you grind nodes.
Insider tips: pre-aim a corner, bait the peek, aux-HE to track as they edge out, then land the 520. Repeat. On open maps, pick a hardpoint early; you won’t rotate in time if the flank collapses. Avoid overcommitting into arty lanes—your silhouette screams “free splash.”
- Role: Assault superheavy, immovable lane anchor.
- Special Mechanic: Auxiliary Gun System — secondary HE barrels on a separate cycle, used for breaking tracks, harassing modules, or finishing crippled targets without losing reload tempo.
Taschenratte — Tier XI German Superheavy Stats Table
| Category | Parameter | Base | Improved | Notes |
|---|---|---|---|---|
| Special Mechanic | Auxiliary Weapons | — | Lane anchor, “bunker” style | |
| Mechanic | Auxiliary Gun System | — | Two HE barrels, independent of main gun cycle | |
| Firepower | Avg damage (AP/Special/HE) | 510/510/660 | 520/520/670 | Main gun alpha |
| Firepower | Pen (mm) | 268/330/66 | — | |
| Firepower | Dispersion (100 m) | 0.36 | 0.35 | — |
| Firepower | Aiming time (s) | 2.1 | 1.9 | — |
| Firepower | Reload (s) | 13.8 | Main gun | |
| Firepower | Ammo | 60 | 70 | — |
| Firepower | Gun dep/elev | −8° / +24° | — | |
| Survivability | HP | 3,300 | 3,500 | Huge durability |
| Survivability | Hull (F/S/R) | 185/190/190 | mm | |
| Survivability | Turret (F/S/R) | 250/230/220 | mm | |
| Vision | View range | 400 m | — | |
| Handling | Turret traverse | 16 °/s | — | |
| Mobility | Engine power | 1,900 hp | 2,000 hp | — |
| Mobility | Power/weight | 9.5 | 10 | hp/t |
| Mobility | Hull traverse | 15 °/s | — | |
| Mobility | Top/Reverse | 18/15 km/h | 20/15 km/h | Very slow |
| Notes | Aux HE usage | — | Track resets, finishers, pressure during reload | |
Playstyle: The Taschenratte is the final word in “you shall not pass.” Use auxiliary HE to perma-track and suppress enemies while the primary reloads. Position early, angle methodically, and accept that rotation and vision are liabilities. With support, it’s nearly unbreakable.
- Strengths: monster HP pool, constant pressure via auxiliary guns, supreme choke control.
- Weaknesses: sluggish, artillery magnet, blind and exposed if isolated.
- NA tip: thrives in city tiles like Himmelsdorf; on open maps, grab a hard corner before being kited.
U.S.S.R. — KR-1 (Tier XI Breakthrough Heavy with Reinforced Ramming)
IS-7 energy with bigger numbers: 540 alpha, 273/330/68 mm pen (268 → 273 on standard), and a chunky 2,600 → 2,800 HP. The hook is passive ramming amplification—no keybind—so clean impact lines turn into HP swings. Top speed is a legit 60/15 km/h, which matters when you need a runway to smack mediums/lights for “free” damage.
- What it does best: track → ram → shot. Use slopes and short sprints to stack momentum, then secure the trade with a follow-up.
- Limits: needs space; eats self-damage; TD cross-angles ruin the party. Accuracy is not a selling point, so pick high-percentage peeks.
- Build hint: turbo + rammer stacks well; ramming directive/skill turns corridor pushes into bowling frames.
Insider tips: platoon synergy is gross—two KR-1s chaining rams delete anchors. On city tiles, use hard corners to hide approach until last second. On open NA maps, don’t yolo into double-bush TDs; force them to shoot allies first, then sprint.
- Role: Corridor bully, vanguard spearhead.
- Special Mechanic: Reinforced Ramming — every collision inflicts extra damage without any keybinds.
KR-1 — Tier XI Soviet Heavy Stats Table
| Category | Parameter | Base | Improved | Notes |
|---|---|---|---|---|
| Special Mechanic | Ramming Configuration | — | Aggressive vanguard | |
| Mechanic | Reinforced Ramming | — | Passive collision damage amp | |
| Firepower | Avg damage (AP/Special/HE) | 530/530/700 | 540/540/700 | — |
| Firepower | Pen (mm) | 268/325/68 | 273/330/68 | — |
| Survivability | HP | 2,600 | 2,800 | — |
| Mobility | Top/Reverse | 60/15 km/h | Other details n/a | |
| Notes | Ramming play | — | Track → ram → shot; needs space/runway | |
Playstyle: Find ramps, lanes, or slopes to build speed, then combine a ram with a shot for lethal HP swings. In platoons, it can snowball fights brutally, but misjudged charges are punished hard.
- Strengths: high alpha, punishing rams, game-changing platoon pushes.
- Weaknesses: needs open space; self-damage risk; struggles against TD angles.
- NA tip: use urban corridors for ram ambushes; avoid charging into open crossfires.
USA — T803 (Tier XI Heavy with Semi-Automatic Ammo Rack)
Frontline brawler that snowballs if you keep hitting. Baseline gun is comfy: 420 alpha (410 → 420), 267/345/60 mm pen, 0.34 dispersion, 1.9 s aim, and ~9.0 s base reload. Each hit grants a reload-efficiency stack (kill adds more) that decays if you disengage, so pressure uptime = damage uptime.
- Survivability: 2,350 → 2,400 HP; hull 215/76/63, turret 215/120/69. Usable, not superheavy. View range 400 m.
- Mobility: 38/13 km/h top/rev (37 → 38), 18 hp/t with nodes, hull traverse 32°/s. −10° depression makes ridge work easy.
Insider tips: prioritize hit probability over greedy trades. Open with safe shots to start the engine, then ride the faster cycles to collapse a lane. With BiA + food + rammer + vents, in-fight reloads dip to spicy territory; a sustained chain can feel like pseudo-autoloader pressure without the downtime. Break LOS to strip enemy stacks; don’t let them do the same to you.
- Role: Sustained-pressure heavy.
- Special Mechanic: Reload Efficiency Stacking — each hit grants reload speed; kill shots add more; effect decays when idle.
T803 — Tier XI American Heavy Stats Table
| Category | Parameter | Base | Improved | Notes |
|---|---|---|---|---|
| Special Mechanic | Semi-Automatic Ammo Rack | — | Momentum DPM | |
| Mechanic | Reload Efficiency Stacking | — | Hit → faster reload (stacks), decays out of contact | |
| Firepower | Avg damage (AP/Special/HE) | 410/410/520 | 420/420/530 | — |
| Firepower | Pen (mm) | 262/340/60 | 267/345/60 | — |
| Firepower | Dispersion | 0.35 | 0.34 | — |
| Firepower | Aim time (s) | 2.0 | 1.9 | — |
| Firepower | Reload (s) | ~9.0 (base) | Effective lower under stacks | |
| Firepower | Ammo | 46 | 56 | — |
| Firepower | Gun dep/elev | −10° / +20° | — | |
| Survivability | HP | 2,350 | 2,400 | — |
| Armor | Hull (F/S/R) | 215/76/63 | mm | |
| Armor | Turret (F/S/R) | 215/120/69 | mm | |
| Vision | View range | 400 m | — | |
| Mobility | Top/Reverse | 37/12 | 38/13 km/h | — |
| Mobility | Engine power | 1,030 hp | 1,080 hp | — |
| Mobility | Power/weight | 17.2 | 18 | hp/t |
| Mobility | Hull traverse | 30 | 32 °/s | — |
Playstyle: Peak-and-shoot on ridges, string consecutive hits to accelerate reload, and snowball engagements. Discipline matters: every miss stalls the advantage.
- Strengths: compounding DPM, reliable handling, versatile corner fighter.
- Weaknesses: misses reset tempo; armor is adequate but not superheavy; ammo can run thin.
France — AMX-67 Imbattable (Tier XI Autoloader with Partial-Cassette)
Speed and finesse over armor. Four-round drum with 420 alpha (410 → 420), 268/328/65 mm pen, 0.34 dispersion, and 2.3 s aim. The mechanic: when the mag hits one shell, a new cassette quietly starts loading. You can still fire the “reserve” shell; doing so adds roughly a few extra seconds to the remaining reload (your notes peg it at ~4.5 s).
- Numbers to know: full reload 31 → 30 s, in-drum auto-reload ~2.5 s; ammo 56 → 64; −9° depression, improved elevation to +15°.
- Survivability: 2,300 → 2,400 HP; hull/turret 80/40/40, 140/60/40—it’s paper. VR 400 m.
- Mobility: 65/22 km/h, 21.2 → 22 hp/t, hull traverse 44°/s.
Insider tips: keep one in the pipe to stay “armed” while the cassette builds—this is how you chain five shots across one window for 2,100+ potential damage. The penalty for spending the reserve is small enough that smart players should use it proactively to deny pushes or steal kills. Don’t brawl; third-party fights from ramp angles, snap 1–2, back to cover while the cassette ticks.
- Role: Mobile clip skirmisher.
- Special Mechanic: Partial-Cassette Reload — when one shell remains, the cassette begins refilling; firing the last shell extends reload.
AMX-67 Imbattable Stats Table — Tier XI French Heavy
| Category | Parameter | Base | Improved | Notes |
|---|---|---|---|---|
| Special Mechanic | Cassette Loading System | — | Tempo skirmisher | |
| Mechanic | Partial-Cassette Reload | — | At 1 shell, new cassette starts; firing reserve adds ~4.5 s | |
| Firepower | Avg damage (per shot) | 410 | 420 | AP/Special/HE scale equally (→ 420/420/530) |
| Firepower | Pen (mm) | 263/328/65 | 268/328/65 | — |
| Firepower | Dispersion | 0.35 | 0.34 | — |
| Firepower | Aim time (s) | 2.5 | 2.3 | — |
| Firepower | Magazine | 4 shells | — | |
| Firepower | Full reload (s) | 31 | 30 | — |
| Firepower | In-drum autoreload | ~2.5 s | — | |
| Firepower | Ammo | 56 | 64 | — |
| Firepower | Gun dep/elev | −9° / +12° | −9° / +15° | — |
| Survivability | HP | 2,300 | 2,400 | — |
| Armor | Hull / Turret | 80/40/40 ; 140/60/40 | mm | |
| Vision | View range | 400 m | — | |
| Mobility | Top/Reverse | 65/20 | 65/22 km/h | — |
| Mobility | Engine power | 1,420 hp | 1,470 hp | — |
| Mobility | Power/weight | 21.2 | 22 | hp/t |
| Mobility | Hull traverse | 42 | 44 °/s | — |
Playstyle: Discipline the last shell. Float it to keep the cassette rolling, or fire only when the payoff is certain. Mastery lets you stretch clips into pseudo 5-shot chains.
- Strengths: lightning-fast mobility, strong gun handling for an autoloader, unique sustained threat.
- Weaknesses: paper-thin armor, unforgiving clip timing, niche HE pen.
United Kingdom — FV4025 Contriver (Tier XI Heavy with Twin-Barrel Salvo)
Canopener, but tighter. Single-fire is accurate (0.33 → 0.32, 1.9–2.0 s aim) with 450 alpha (440 → 450) and 270/323/57 mm pen. Flip to Salvo to double-tap for 900 while accepting harsher bloom (~1.1 → 1.0 accuracy), longer aim (3.2 → 3.0 s), and slower handling/speed (~25/12 vs. 34/12).
- HP: 2,400 → 2,500. Depression −10° remains a British cheat code for ridge control.
- Reloads: ~10 s single, ~9 s Salvo cycle. Salvo stability and speed are both improved compared to Canopener.
Insider tips: pre-aim in single, then toggle and dump—don’t enter Salvo and try to fine-aim; you’ll fight the penalties. Use the double to win HP-even trades or cap resets. On city maps, staging a corner with Salvo ready makes enemies respect your lane, hard.
- Role: Punisher heavy, lane control specialist.
- Special Mechanic: Salvo Mode — fires both barrels simultaneously; accuracy, aim time, and mobility suffer during use.
FV4025 Contriver Stats Table — Tier XI British Heavy (Twin-Barrel)
| Category | Parameter | Base | Improved | Notes |
|---|---|---|---|---|
| Special Mechanic | Salvo Fire Mode | — | Precise single fire / bursty Salvo | |
| Mechanic | Salvo Mode (twin-barrel) | — | Higher burst; worse accuracy/aim/mobility while active | |
| Firepower | Avg damage (single) | 440 | 450 | Per shell; Salvo = double |
| Firepower | Pen (mm) | 265/323/57 | 270/323/57 | — |
| Firepower | Accuracy (single) | 0.33 | 0.32 | — |
| Firepower | Accuracy (Salvo) | ~1.1 | ~1.0 | — |
| Firepower | Aim time single/Salvo | 2.0 / 3.2 s | 1.9 / 3.0 s | — |
| Firepower | Reload single/Salvo | ~10 s / ~9 s | — | |
| Firepower | Ammo | 70 | 80 | — |
| Gun handling | Gun dep/elev | −10° / +20° | — | |
| Survivability | HP | 2,400 | 2,500 | — |
| Mobility | Top/Reverse (single) | 34/12 km/h | — | |
| Mobility | Top/Reverse (Salvo) | ~20–25 / 12 km/h | Turret traverse also slowed in Salvo | |
Playstyle: Pre-aim in single-fire, flip to Salvo for cap resets or brawling bursts. Commit fully—hesitation kills.
- Strengths: devastating burst trades, flexible modes, strong depression.
- Weaknesses: Salvo penalties are punishing; indecision is lethal.
China — BZ-79 (Tier XI Jet Heavy with Liquid Fuel Boosters)
Jack-of-most-trades with a smarter dash button. Gun slaps for 700 alpha (690 → 700) with 265/330/90 mm pen, 0.41 dispersion, and ~2.8 s aim; reload lives around 17 s with ammo 30 → 35. Armor is classic Chinese heavy: turret 340/150/70, hull 150/120/60. HP moves from 2,740 → 2,900.
- Mobility: base 30/15 → 32/16 km/h, ~13.1 hp/t, hull traverse ~30°/s. The Liquid Boosters use an overheat bar—tap for 1–2 seconds to cross kill zones; let it cool mid-fight.
- Vision: VR 390 m. You’re not sneaking anywhere—accept the spots.
Insider tips: burst to positions at start, then anchor hull-down and trade 700s on rhythm. Save heat for decisive mid/late rotations (cap resets, escapes). Don’t hold the booster key like old rockets—short taps prevent a lockout when you actually need it.
html
- Role: Initiative heavy; turret anchor after aggressive positioning.
- Special Mechanic: Liquid Fuel Boosters — short sprints until the overheat bar maxes; cooldown restores use.
BZ-79 Stats Table— Tier XI Chinese Heavy (“Jet Heavy”)
| Category | Parameter | Base | Improved | Notes |
|---|---|---|---|---|
| Special Mechanic | Liquid Fuel Boosters | — | Boost to position, trade alpha | |
| Mechanic | Liquid Fuel Boosters | — | Overheat bar; short tap bursts | |
| Firepower | Avg damage (per shot) | 690 | 700 | AP/Special/HE scale (→ 700/700/900) |
| Firepower | Pen (mm) | 260/325/90 | 265/330/90 | — |
| Firepower | Dispersion | 0.42 | 0.41 | — |
| Firepower | Aim time (s) | 2.8 | — | |
| Firepower | Reload (s) | ~17 | — | |
| Firepower | Ammo | 30 | 35 | — |
| Firepower | Gun dep/elev | −8° / +20° | — | |
| Survivability | HP | 2,740 | 2,900 | — |
| Armor | Hull (F/S/R) | 150/120/60 | mm | |
| Armor | Turret (F/S/R) | 340/150/70 | mm | |
| Vision | View range | 390 m | — | |
| Handling | Turret traverse | 24 °/s | — | |
| Mobility | Engine power | 850 hp | — | |
| Mobility | Power/weight | 13.1 hp/t | — | |
| Mobility | Hull traverse | 30 °/s | — | |
| Mobility | Top/Reverse | 30/15 | 32/16 km/h | Boost for quick jumps |
Playstyle: Use boosters to seize key ridges early, then lock down trades with turret armor. Heat discipline is everything—don’t burn the bar before decisive moments.
- Strengths: powerful alpha, turret fortress, on-demand speed bursts.
- Weaknesses: very long reload, poor concealment, overheats at bad times.
Personal Missions Reward — Black Rock (Tier XI Heavy with Burst-Fire Cassette)
Sector 3’s trophy plays like a classic US heavy until it doesn’t. Land two penetrating hits to arm a special cassette; the next “shot” fires a quick two-round burst at the same reload cost as one shell—an 800+ HP swing on demand.
- Firepower: 430 alpha (420 → 430), 283/335/57 mm pen, 0.33 dispersion, ~2.0 s aim, ~10.5 s reload, ammo 50 → 60, −8° depression.
- Durability/Mobility: 2,400 → 2,450 HP; hull 171/88/50, turret 330/120/76; 45/15 km/h, 18 hp/t, hull traverse 35°/s, VR 400 m.
Insider tips: earn Burst safely—high-percentage pens from ridges/cover—then isolate targets and cash the double. Protect the 171-mm hull with terrain; play cycles of 2 pens → burst → reset. Without Burst active, treat it like a good single-shot heavy and don’t overexpose for trades you can’t win.
- Role: Precision brawler with fight-swinging bursts.
- Special Mechanic: Burst-Fire Cassette — after 2 consecutive pens, the next reload produces a double-shot salvo at single reload cost.
Black Rock Stats Table— Tier XI Special Heavy (Personal Missions)
| Category | Parameter | Base | Improved | Notes |
|---|---|---|---|---|
| Special Mechanic | Burst Mode | — | Burst swing after 2 pens | |
| Mechanic | Burst-Fire Cassette | — | 2 consecutive pens → next “shot” fires two shells (same reload as single) | |
| Firepower | Avg damage (per shot) | 420 | 430 | AP/Special/HE scale equally |
| Firepower | Pen (mm) | 278/330/57 | 283/335/57 | — |
| Firepower | Dispersion | 0.34 | 0.33 | — |
| Firepower | Aim time (s) | 2.1 | 2.0 | — |
| Firepower | Reload (s) | ~10.5 | Salvo = two shells within that cycle | |
| Firepower | Ammo | 50 | 60 | — |
| Firepower | Gun dep/elev | −8° / +20° | — | |
| Survivability | HP | 2,400 | 2,450 | — |
| Armor | Hull (F/S/R) | 171/88/50 | mm | |
| Armor | Turret (F/S/R) | 330/120/76 | mm | |
| Vision | View range | 400 m | — | |
| Handling | Turret traverse | 35 | 37 °/s | — |
| Mobility | Top/Reverse | 43/14 | 45/15 km/h | — |
| Mobility | Engine power | 950 hp | 1,000 hp | — |
| Mobility | Power/weight | 17.3 | 18 | hp/t |
| Mobility | Hull traverse | 33 | 35 °/s | — |
Playstyle: Secure two safe pens, then use the instant 800+ HP salvo to punish greedy opponents. Protect the weak hull and cycle bursts carefully—this is a tempo tank, not a clip dumper.
- Strengths: lethal burst potential, turret armor, accurate handling.
- Weaknesses: fragile hull, underwhelming without Burst, sluggish reverse speed.
Match Flow: Counters and Teamplay
Taschenratte — Managing the Bunker
The Taschenratte dominates when it can dictate trades, but counterplay exists. Never attempt solo pokes against it; the combination of immense HP and auxiliary weapons makes it a trap. Its auxiliary gun system can track you during its primary reload, locking your tank in place for the follow-up alpha. The counter is to approach as a team and save repair kits deliberately. Ideally, bait the auxiliary shot, then force it into long main-gun downtime. Coordinated crossfires exploit the slow traverse and the absence of real repositioning speed. A Taschenratte under pressure from two angles quickly shifts from an immovable wall into an oversized damage sponge that cannot cover all threats. Teams must respect its frontal armor, but constant chip damage combined with stuns, fires, or permatracks will overwhelm it faster than brute force trades.
KR-1 — Shutting Down the Charger
The KR-1 thrives on acceleration lanes that allow it to ram for massive swings. The counterplay is straightforward: deny it the runway it needs. Map positioning should stagger retreats and avoid giving the KR-1 long sightlines to accelerate. Anchor tank destroyers or heavy turrets in choke points where it cannot build speed. If forced to engage, punish its post-ram downtime—the KR-1 commits to impact and often eats return fire while recovering. Teammates should focus fire the moment it connects, as its mechanic requires full momentum to shine. Disrupting terrain access—using rubble, slopes, or staggered cover—minimizes its ability to build speed. Treated correctly, the KR-1 becomes just another brawler heavy with predictable patterns rather than an unstoppable battering ram.
T803 — Breaking the Chain
The T803 builds its advantage with every hit it lands, lowering reload times through its stacking mechanic. The counter is to starve it of consistent damage chains. Force misses whenever possible—smoke, hard cover, and sudden line-of-sight breaks reset its tempo. While the base reload is serviceable, its true threat emerges once it strings multiple shots together. Every ricochet or missed shot denies that snowball effect. Instead of meeting it in straight trades, teams should force awkward angles or screen it with stuns that break the rhythm. Against the T803, greed is punished—trading shot-for-shot is acceptable early, but as stacks build, the DPM spike becomes overwhelming. Heavy cover and coordinated retreats defuse its momentum, buying time for allies to exploit flanks or for artillery to punish its exposure. Neutralize its uptime and its core advantage collapses.
AMX-67 Imbattable — Counting the Magazine
The AMX-67 lives and dies by how it manages its partial-cassette reload. Counters revolve around watching its shell count. Once four rounds are fired, pressure the angle immediately. If it floats the last shell, assume it is waiting for background reload and adjust positioning cautiously. If it greedily dumps the fifth, exploit the longer reset window by punishing hard during that downtime. The tank’s threat stems from chaining sequences that blur into five-shot strings. Punish those moments when it cannot immediately reload into another full burst. Vision control also plays a role: deny it the opportunity to use speed to create surprise angles. By recognizing the rhythm—four shells equals danger, five shells equals recovery—you control the engagements and avoid getting overwhelmed by sustained bursts.
FV4025 Contriver — Managing the Salvo
The Contriver is all about the threat of its Salvo Mode. The double-barrel dump swings trades decisively, but the penalties afterward open a recovery window. The key to counterplay is baiting Salvo shots, then pressing the tempo before it stabilizes. Teams should avoid broadside peeks into pre-aimed double taps, as that is where the Contriver excels. Instead, force it to waste the salvo into partial armor or poor angles, then crash its reduced accuracy and mobility during cooldown. Patience is rewarded; if you deny it perfect Salvo shots, its damage per minute drops into a predictable rhythm. City corners, coordinated peeks, and bait-and-switch tactics neutralize its peak threat. Once the Salvo is out of the way, the Contriver’s normal single-shot performance is strong but manageable compared to its devastating burst potential.
BZ-79 — Trapping the Booster
The BZ-79 blurs the line between heavy and pseudo-medium with its liquid fuel booster system. The way to counter it is to focus on the rhythm of its dash. The booster ends quickly, and what follows is a 17-second reload window. Trap it at the end of its dash by predicting where it will land and setting crossfires. Players should never chase during its acceleration phase; instead, wait for the inevitable cooldown to begin. This forces the BZ-79 into predictable exposure patterns. The key is recognizing that the booster does not grant sustained mobility; it creates moments of tempo. If you can hold angles and punish the landing spots, the tank loses its surprise edge and must rely on traditional hull-down play, which is easier to contain.
Black Rock — Breaking Burst Mode
Black Rock’s unique Burst-Fire Cassette is only dangerous if it strings together two penetrations. The counterplay is to interrupt that setup. Force one bounce or block a shot before the third, and Burst Mode collapses. This buys valuable time to trade evenly without facing a sudden 800+ damage swing. Focus on denying consistent penetrations—angling armor, using cover, or forcing shots into tracks. Because the mechanic is accuracy-dependent, it punishes the Black Rock more than the opponent when cycles are broken. Treat it as a single-shot heavy until it earns its burst, then punish the window afterward. Teams that stay disciplined can neuter its prestige mechanic, keeping fights manageable even against one of the most dangerous reward tanks.
Upgrades, Economy, and NA-Friendly Planning
Upgrade Priorities
Tier XI tanks bring a new upgrade system that eliminates trade-offs and focuses only on positive improvements. The most efficient path is to prioritize large nodes that enhance the vehicle’s unique mechanic. For example, reducing the auxiliary gun cooldown on the Taschenratte, stabilizing Salvo Mode for the Contriver, or shortening partial-cassette reloads for the AMX-67. These investments sharpen the defining traits that make each tank special. Smaller nodes can be added later to shore up secondary stats such as gun handling, traverse, or view range. The lesson is simple: build into what makes the tank unique, then round out the weaknesses. Ignoring the signature ability wastes the main reason to play Tier XI.
Economic Considerations
Credits and resource management are non-trivial at Tier XI. Each tank costs around 7.4 million credits, and that figure adds up fast across multiple branches. Players must plan grinds carefully, combining event rewards, credit boosters, and the new “gift” branch in Update 2.0 to offset expenses. Rearranging resources before committing to purchases is key, especially for free-to-play accounts. Those who dive in without a plan may find themselves with a new tank but unable to properly equip or upgrade it. Smart commanders will stockpile bonds, credits, and consumables ahead of time to ensure their Tier XI debut feels like an upgrade, not a downgrade.
Loadouts and Flexibility
Another important addition is the second equipment loadout at Tier XI. This feature finally makes dual builds practical: one loadout can focus on brawling setups with rammers and armor hardening, while the other prioritizes mobility or vision builds for open maps. This flexibility allows tanks to adapt to matchmaking conditions instead of being locked into one build. For example, the KR-1 can pivot between a turbo/ramming kit for aggressive city pushes and a stabilized build for more open maps. Similarly, the T803 can run DPM-max setups in city brawls and vision-heavy builds when range is critical. The second loadout system is a quality-of-life boost that ensures Tier XI tanks deliver variety, not just raw power.
Should Players Rush These Grinds?
Who Will Benefit Most
Not every Tier XI heavy is equally rewarding for all playstyles. The skill-ceiling standouts are the AMX-67, which demands tempo mastery; the Taschenratte, which rewards patient utility control; and the T803, which offers uptime DPM for disciplined players. For straightforward brawlers, the KR-1 delivers satisfaction with ramming trades and simple aggression. Map readers and tempo controllers will enjoy the BZ-79, using boosters to dictate position. The FV4025 Contriver appeals to patient punishers who can time Salvo shots for maximum payoff. Finally, the prestige chase belongs to the Black Rock, which demands consistency to unlock its double-shot burst. Every tank has its audience, but understanding their ceiling is key to choosing wisely.
Time, Effort, and Sector 3
Grinding to Tier XI is no short trip, and Black Rock raises the bar further. Its Sector 3 personal missions represent a marathon rather than a sprint. The sheer HP pools and damage requirements at Tier XI elevate even “simple” tasks into long campaigns. Players must prepare for an investment of both time and nerves. Those who commit will eventually unlock one of the most unique reward heavies in the game, but patience and discipline are mandatory. For most players, pacing grinds with events, boosters, and credit stockpiles is smarter than rushing. Tier XI is not just another tier—it is an ecosystem shift, and only thoughtful planning will make the transition feel rewarding.
Conclusion
Tier XI heavy tanks redefine what it means to fight at the top of World of Tanks. Instead of simply inflating armor or hit points, Update 2.0 shifts the cadence of high-tier battles through unique mechanics that give each tank a distinct rhythm. The result is a battlefield where timing, recognition, and counterplay matter more than ever. Auxiliary weapons turn reload downtime into constant pressure. Ramming configurations force teams to consider terrain denial. Reload stacking rewards accuracy and uptime discipline. Partial-cassette systems extend bursts without leaving gaps. Twin-barrel salvo play creates bait-and-punish moments, while liquid fuel boosters shift early positioning and late-game rotations. Finally, burst-fire cassettes punish any lapse in angling with devastating double taps.
The supporting structure of trade-off-free Upgrades amplifies these tools without saddling them with drawbacks. For players, that means each Tier XI is less about raw numbers and more about choosing which lever to pull and when. Do you anchor with utility, punish with momentum, or outlast with tempo? The answer depends on map, matchup, and coordination. This flexibility ensures Tier XI does not feel like a blunt escalation but a nuanced evolution. The ceiling rises not because stats climb endlessly, but because the toolkit is richer and the battles sharper.


