 Skip to content
 Let’s face it—most players dive into World of Tanks like it’s an arcade brawler. They charge forward, take a few wild shots, and get blown up before the first capture point turns. But this isn’t Call of Duty with cannons—it’s a tactical war game where the smartest tankers win. That’s where a solid World of Tanks strategy makes all the difference. This game rewards calculated moves, not chaotic aggression. If you’ve been losing more battles than you win, chances are you’re missing the fundamentals of proper positioning, vision control, and role-based gameplay. Whether you’re running a light tank or anchoring a flank in a heavy, your decisions—not just your aim—decide the outcome. In this guide, we break down what actually works: how to outplay, outmaneuver, and outthink your enemies using proven, real-world World of Tanks strategy tactics. If you’re ready to stop being a free kill and start playing like a threat, let’s get into it.
TL;DR
- Map positioning is king—flanking beats brute force.
- Camouflage & spotting mechanics decide who shoots first (and last).
- Each tank role has a job—do yours or lose fast.
- HP is your currency—spend it wisely or sit in the garage.
- Platoons and teamwork crush lone wolves every time.
Map Awareness: The Hidden Battlefield IQ
Knowing where you are on the battlefield is only half the fight—understanding what that space means in relation to your tank type, enemy movements, and the objective is what separates casual players from real threats. Map awareness isn’t about memorizing routes—it’s about predicting enemy behavior based on spawn positions and map control. Top-tier players can already guess what tank types are going where before the match starts, and they prepare counter-moves before the countdown ends.
Recognizing power positions is another layer. High ground almost always beats flat terrain because of the vision advantage and shot angle. Similarly, choke points serve as strategic areas to control flanks, cut off rotations, or funnel enemies into kill zones. Knowing these locations ahead of time lets you reach them faster, set up ambushes, or avoid getting funneled yourself. If you’re in a light or medium tank, use your speed to take early map control.
For slower tanks like heavies or tank destroyers, positioning should emphasize cover and lane denial. Always keep an eye on your minimap, even when engaging. Tunnel vision is the number one killer in World of Tanks, and map awareness is your vaccine.
Initial Positioning in World of Tanks Strategy: Make Every Second Count
Every second during deployment defines your game. The moment the countdown hits zero, most players still hesitate—deciding whether to go left, right, or just follow the crowd. Meanwhile, experienced tankers are already halfway to a critical ridge, securing vision or setting up ambush lanes. Initial positioning is about seizing initiative. Knowing your tank’s strengths helps determine where you need to go: heavies to brawling corridors, lights to bushes, TDs to sniping lines, and meds to flex lanes. On maps like Prokhorovka or Malinovka, early movement to ridge lines can provide game-winning vision and influence.
If you arrive too late, you lose that advantage—and your chance to spot or block enemy scouts. Aggressive light tank players will punish indecision by lighting your team before they even fire their first shell. Also consider enemy team composition. Are there more lights than usual? Expect aggressive scouting. Is the enemy heavy stacked? Then the city side might be flooded. Good players don’t wait to find out—they predict and position accordingly. Initial positioning is not just about where you start—it’s about where you can safely deal damage, avoid unnecessary exposure, and influence the enemy’s momentum. Mastering this means you win before the shooting even begins.
Flanks, Chokes & Terrain Abuse
World of Tanks maps are more than just battlegrounds—they’re full of built-in traps, sightlines, and terrain features that give an edge to players who know how to use them. Choke points, like the infamous castle in Himmelsdorf, can control entire lanes. Tanks that push too aggressively into these areas often find themselves surrounded, tracked, and focused down. That’s why smart players don’t just charge—they hold, peek, and punish.
If you’re in a heavy tank with good frontal armor, these areas are where you can shine, especially if you’re sidescraping or hull-down. High ground is another crucial feature. It doesn’t just give you a better view of the battlefield—it also forces enemies to expose more of their tank when firing upward. On maps like Mountain Pass or Cliff, controlling elevation gives your team the edge. You can fire down into enemy weak spots while keeping much of your own tank hidden.
Lastly, terrain abuse matters. Ridgelines are perfect for going hull-down. Dips and rubble piles make excellent cover for quick reloading or baiting shots. Understanding how to use natural and artificial cover not only improves survival—it opens up new angles for ambushes, resets, and last-stand defenses.
World of Tanks Strategy: Play Your Role or Die Trying

World of Tanks isn’t a free-for-all shooter—it’s a role-based strategy game disguised as an action game. Each class of tank serves a tactical purpose, and the second you ignore that role, you throw the match for your team. Light tanks scout and create map control. Mediums shift the balance by reinforcing weak lanes.
Heavies anchor and brawl, while tank destroyers deny space and punish missteps. Artillery breaks entrenched enemies and pressures snipers hiding in the back. The beauty of the class system is how interdependent it is. Without lights, your TDs can’t see anything to shoot. Without heavies, mediums get focused. Without arty, hull-down tanks dominate.
That’s why knowing your job is critical. You can’t just “do damage.” You have to do the right damage, at the right time, in the right place. Veteran players read the enemy composition and choose their engagements accordingly. A good team doesn’t split five heavies on a 3-line push. A smart platoon won’t push without vision. Role fidelity matters—break it, and you’ll find yourself isolated, unsupported, and blamed in the post-game chat.
Light Tanks (LT)
Light tanks are the eyes of the team—and in the right hands, absolute game-breakers. Their main job is not to rack up damage but to secure vision. Especially on open maps like Prokhorovka or Malinovka, a single well-placed light tank can light up half the enemy team for artillery and TDs to feast on. But lights are fragile and usually under-gunned, so trading HP early is a massive mistake. The real key to dominating in lights is the “double bush” technique. It lets you fire without being seen.
Here’s how it works: sit in one bush, shoot, and then immediately pull back so another bush becomes fully opaque between you and the enemy. Done right, you stay invisible. Combine that with high camo crew skills, binocs, and food, and you become a nightmare. Your job is to live, light, and relocate. Stay unpredictable. Zigzag, shift flanks, passive spot until the mid-game, then swoop in for cleanup. Trying to “brawl” in a light tank is pure suicide, and it lets your team down. Stay alive, stay hidden, and let the others do the dirty work while you control the map silently.
Medium Tanks (MT)
Medium tanks are the chameleons of World of Tanks. They flex, they flank, and they fill gaps in your team’s formation. Unlike heavies or TDs, they’re not built for one specific task. Instead, they’re designed to adapt. On wide-open maps, a medium can support a light by adding pressure or securing ridge lines.
On city maps, mediums can use their mobility to out-rotate enemies and take flanks while heavies slug it out. Their greatest strength is flexibility. Mediums have the speed to reposition, the firepower to deal consistent damage, and—sometimes—just enough armor to win a trade if played carefully. They excel in the mid-game when the frontlines are set, and you need to collapse flanks or exploit gaps. Use this to your advantage. But many players waste that potential by staying too long with heavies or camping in the back. That’s a mistake.
Your mobility is your weapon. Keep the map in your head. Look for overextensions, isolate targets, or push ridgelines with depression. Most importantly, don’t sit still. The second you stop moving, you’re not playing a medium—you’re playing a target.
Heavy Tanks (HT)
Heavies are the backbone of every frontline. Their role is straightforward but critical: push, hold, and out-trade. Their thick armor and alpha damage make them ideal for holding choke points and drawing attention. The best heavy players know how to angle their armor, bait shots, and trade HP efficiently.
If you’re just YOLOing out of cover, you’re doing it wrong. The trick? Sidescraping and hull-down tactics. By angling your tank at 30–45 degrees, you increase your effective armor thickness and can bounce shots that would otherwise pen you straight through. Combine that with hard cover—like city corners or rubble—and you become nearly unkillable. But heavies can’t do everything alone.
If you try to push without support, you’ll be tracked, focused, and deleted. Your job is to draw fire while your teammates punish. Coordinate, push as a unit, and control key areas like corridors or cap zones. Chasing kills across open fields is how most heavy players throw the match. Good heavies don’t just survive—they lead. Be the battering ram, not the anchor.
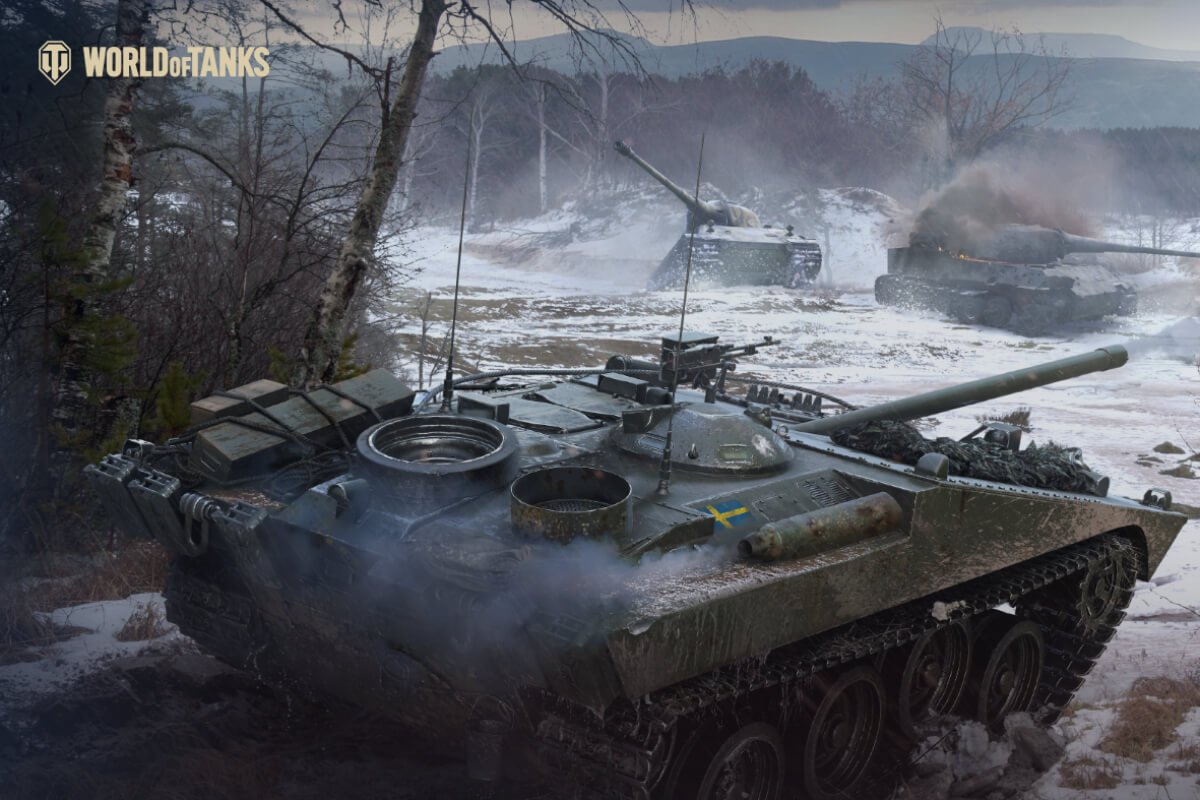
Tank Destroyers (TD)
Tank destroyers thrive on patience, distance, and opportunity. They aren’t brawlers, they’re ambushers—and when played properly, they become the executioners of the battlefield. A TD’s main job is to punish enemies that expose themselves—especially those that overextend into vision lines lit by light or medium tanks. They don’t lead the charge; they end it. The best TD positions are slightly off the expected angles, usually behind foliage or elevation, so you can stay hidden after firing.
Equipment like Camo Net and Binoculars drastically improve your ability to play the long-range sniping game, and that makes positioning everything. You’re not a base camper—you’re a lane denier. If you’re still in your spawn at the 5-minute mark, you’re wasting potential. The other secret to playing TDs well? Relocate. After firing a couple of shots, smart enemies will blind fire your last position. Move between shots when safe and track enemy behavior. Let your teammates spot—don’t chase vision yourself. And don’t just shoot the first thing you see.
Prioritize low-HP tanks, dangerous pushers, or isolated flankers. That’s how you become the silent MVP of the match, dealing thousands of damage while never being seen.
Artillery (SPG)
Love it or hate it, artillery plays a tactical role that no other tank class fills. SPGs are the pressure cookers of the game—they punish campers, crack open hull-down defenses, and force repositioning. Your job as an arty player is to support—not spam. You create space for your team to breathe by making life hell for the enemy’s static tanks.
With the 2024–2025 updates, artillery is no longer the brute-force splash tool it used to be. Splash radius has been reduced, aim time nerfed, and accuracy changed. That means every shot counts. Use your aim indicator and wait for perfect moments—like when a heavy is locked in a corner or a TD is scoped in without moving. Your targets should be predictable enemies: tanks behind cover, camping snipers, or heavies in tight spots. Avoid firing at fast-moving scouts—you’ll waste shots. Also, reposition regularly.
The moment you’re lit, relocate. Good players will blind-fire your last known position, and one shell will end your game. Artillery may not be flashy, but it shapes engagements. A smart SPG can break a stalemate or save a flank without moving an inch.
Armor Use & Positioning: Reverse the Pain with Smart World of Tanks Strategy
Armor in World of Tanks isn’t just about thickness—it’s about angles, timing, and baiting. You can have 250mm of turret armor, but if you expose it wrong, you’ll get penned every time. That’s why positioning is critical. You want to show only what you want the enemy to shoot, and everything else needs to be hidden, angled, or moving.
Good players abuse armor models. They reverse angle at corners, making their side armor tougher than the front. They wiggle when reloading to mess up enemy aim. They bait turret rings and then quickly snap back into cover. These aren’t gimmicks—they’re fundamentals at higher tiers. Positioning is tied to armor.
Urban maps with lots of cover favor armor-dependent playstyles—sidescraping, peek-a-booming, hull-down tactics. Open maps require more finesse, as exposing your tank too long can mean instant deletion. Use terrain dips, rubble piles, and dead tanks to shield your lower plate. Ultimately, armor isn’t just a stat—it’s a tool. Master it, and you’ll find yourself winning duels against statistically superior tanks just by out-positioning them.
Reverse Angling: Bounce Everything
Reverse angling is one of the simplest, yet most powerful armor tactics you can learn—and it works wonders in city maps or choke points. Instead of poking out your front like a paperweight, you position your tank so your rear sides are showing at a steep angle, and your frontal weak spots stay hidden. This forces incoming shells to hit your side armor at extreme angles, making bounces far more likely.
This works especially well for German heavies or rear-mounted TDs with strong side armor. Pair this with a hard corner or solid cover, and you’ve built yourself a brick wall. The key is to keep your gun in play without overexposing your hull. That’s a dance of patience and micro-adjustments—creep out, bait a shot, bounce it, and retaliate with full alpha. Add a little movement while angling—some call it “wiggling”—to throw off enemy aim even more. But don’t overdo it, or you risk exposing flat spots. Reverse angling isn’t about hiding—it’s about making the enemy waste their shots while you trade for free.
Hull-Down Tactics: Be the Troll
Hull-down play is how certain tanks become nearly invincible. If you’ve got a strong turret—think T29, Super Conqueror, Chieftain—then you want to show just that and nothing else. Position your tank behind a ridge, a slope, or rubble so only your gun and turret are visible to the enemy. Suddenly, you’re bouncing everything while dishing out return fire with impunity. What makes this so effective is how Wargaming’s mechanics calculate shell penetration.
Turrets usually have stronger armor than hulls, and the slope angles can make them even harder to pen. If you combine this with good gun depression, you can shoot while only your toughest part is exposed. Smart enemies will try to flank you, splash you with arty, or wait for you to get bored. Don’t give them the chance. Pick safe positions where your hull can’t be rushed easily. And if you’re hull-down and being ignored—great. That means the enemy sees no point in wasting shots on you.
Keep dishing damage and soaking up potential until they have no choice. Master hull-down tactics, and you’ll frustrate entire flanks into submission.
Attack or Defend? Smart World of Tanks Strategy Calls the Shots
The biggest mistake new players make is thinking every battle is a race to kill. It’s not. World of Tanks rewards control, coordination, and tempo. That means sometimes you push—and sometimes you hold. Knowing the difference is what separates clutch players from stat padders. If your team is trading HP well, clearing out flanks, and maintaining vision, it’s time to push. But that push needs to be smart—don’t charge into crossfire or unlit zones. Use terrain, cover each other, and collapse the enemy slowly. Focus fire and trade effectively. On the flip side, if your team is bleeding, stop the bleeding.
Fall back to stronger positions, go hull-down, sidescrape, and let them come to you. Defensive play isn’t camping—it’s baiting. Let the impatient enemy overextend and punish their greed. The best players constantly switch between offensive and defensive play mid-match. They read the minimap, identify weak lanes, and make pressure moves when it matters. And when they’re not pressing an advantage, they’re preserving HP for the next phase. The goal isn’t just to win—it’s to win clean.
Learning from the Pros: Tools & Communities
If you’re serious about mastering World of Tanks, you need to learn from players who’ve already been through the grind, the rage, and the climb. Pros don’t just play—they teach, refine, and share every micro-decision that gets them from 50% win rate to unicum status. And the best part? You don’t have to figure it all out alone.
Start with YouTube. QuickyBaby and Skill4ltu are two of the most respected World of Tanks streamers, known for their in-depth gameplay analysis, live commentary, and strategic breakdowns that teach you how to think like a high-tier player. QuickyBaby breaks down positioning, tank reviews, and tactics for all skill levels. Skill4ltu goes deeper, dissecting meta strategies and high-tier performance play. Their content is gold for understanding what works in today’s patch. Then there’s Reddit—specifically r/WorldOfTanks. It’s a mix of banter, memes, and brutally honest advice. Search for beginner threads, map guides, or “how did I die?” replays and you’ll see firsthand how experienced players think. And don’t sleep on tools like Tank Inspector. It lets you explore tank models, weak points, and armor layout without guessing.
Combine that with official guides from Wargaming’s site for map breakdowns, role explanations, and vision mechanics. The formula is simple: watch, read, apply, improve. That’s how you go from being carried to carrying games.
Conclusion: Smart Play Beats Lucky Shots
Too many tankers chase big numbers and flashy plays, but that’s not what consistently wins games in World of Tanks. The truth? It’s the players who play smart—those who know their role, manage their HP, and control the map—who quietly carry matches. This game rewards brains over reflexes, strategy over bravado. Top damage is nice, but if you got it by ignoring flanks, bleeding HP, or camping while your team died, you didn’t win—you just farmed.
Positioning, timing, and information are what win battles. Know when to push. Know when to fall back. Know when to trade, and when to hide. That’s real skill. If you take one thing away from this guide, let it be this: the smartest player on the battlefield is usually the last one standing. Whether you’re in a scout lighting up the map, a heavy soaking pressure at a choke point, or a TD farming resets from a sneaky angle, your decisions—not your aim—define your impact. So slow down. Think more.
Play the map, not just the enemy. That’s how you go from decent to dangerous. Understanding terrain, lanes, and sightlines across standard, encounter, assault, and Grand Battles maps in World of Tanks gives you the edge before the first shot is even fired. And once you make that shift? You won’t just win more—you’ll know exactly why you’re winning.


